Build A Hammock Stand!

My wife keeps bugging me about building a hammock stand for the backyard. Why buy a cheap Chinese made one when you can build a high quality metal stand for about the same price?
It's a very simple project but since I know what it's like to be a beginner and not know where to start and what steps to take, I made up these plans. I also have them in pdf format as well and they will be available soon. However these directions on how to build a hammock stand should suffice.
Materials Required For The Hammock Stand Build:
- (26 FT) Hot Rolled Steel Square Tube, 2” X 2” X .12” (11 GA).
- (1 FT) Hot Rolled Steel Sheet, 2” X 1/8”.
- (2) 3/8-16 X 3” SS Bolt-in Hook.
- (4) 3/8-16 SS Hex Nut.
- (4) 3/8 SS Flat Washer.

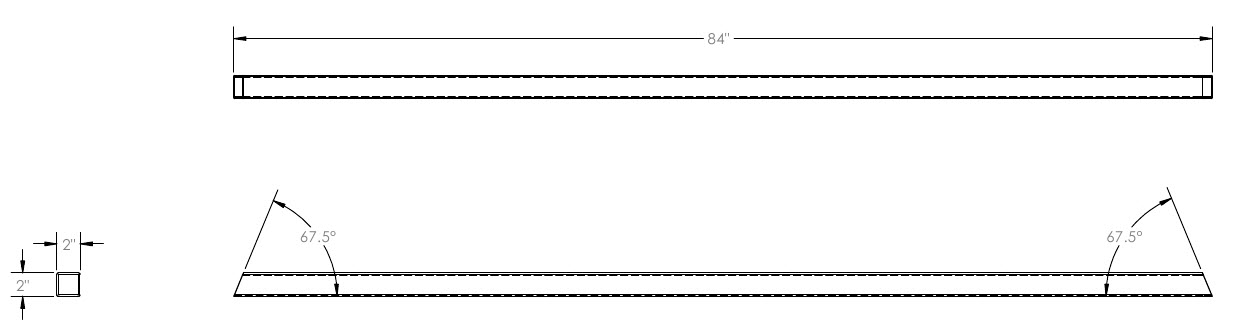
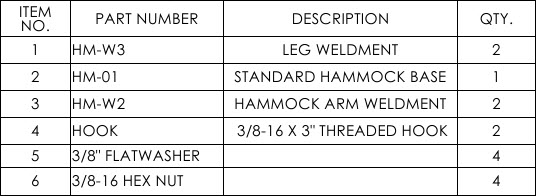
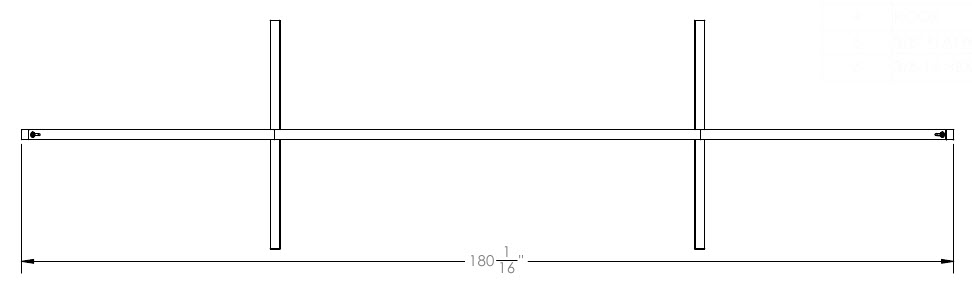
- Step 1: Cut part numbers HM-01 (qty 1), HM-03 (qty 2), and HM-04 (qty 6) according to their attached drawing.
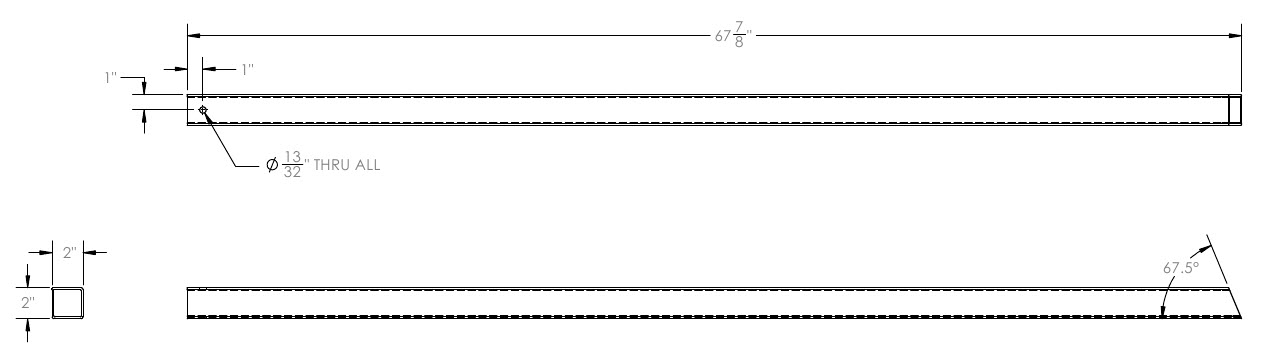
- Step 2: Cut part number HM-02 (qty 2) to length and drill hole in each part according to drawing.
- Step 3: Gather parts HM-03 (qty 1) and HM-04 (qty 2) and lay them out on the welding surface. Position them according to drawing HM-W3 and tack weld the parts in place. Double check alignment and complete the welds. Repeat Step 2 for second leg weldment.
- Step 4: Gather parts HM-02 (qty 1) and HM-04 (qty 1) and lay them out on the welding surface. Position them according to drawing HM-W2 and tack weld the parts in place. Double check alignment and complete the welds. Repeat Step 3 for second arm weldment.
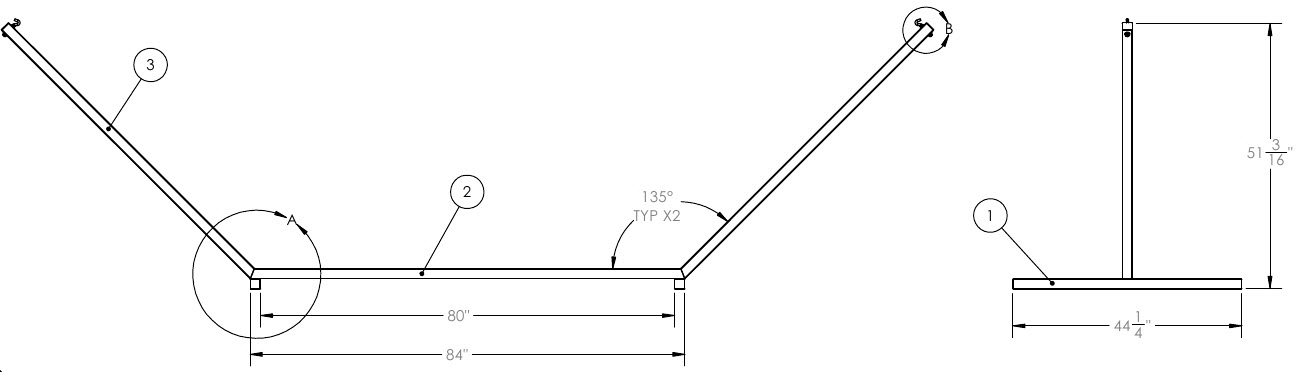
- Step 5: Gather completed weldments HM-W3 & HM-W2 as well as part HM-01. Position the arms (HM-W2) and the base (HM-01) according to drawing HM-W1 and tack weld the arms in place.
Align this sub-weldment on the two legs (HM-W3) according to drawing HM-W1 and tack weld the legs in place. Double check alignment and complete all welds.
 |
 |
- Step 6: Paint or powder coat as desired.
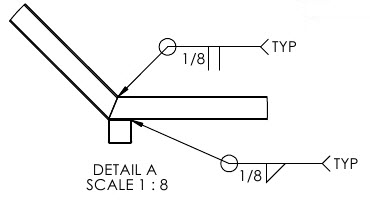
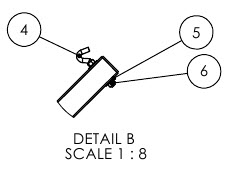
- Step 7: Attach hook bolts to completed frame according to drawing HM-01.
- Step 8: Attach hammock and relax.
Drawings:
Click Images For A Larger View!
Cross reference the numbers on the charts with the drawings below them.
The Hammock Base:
The Hammock Arm:

The Leg:


Weldments:
  |
  |
Tip: You may want to modify it to be a foldable stand. Let me know if that interests you.
This is what the completed hammock stand will look like:
Copyright WcWelding.com All Rights Reserved.


Welding Plans:

New! Welding Table
New! Log Splitter
Top Projects:
