Welding Aluminum Cans

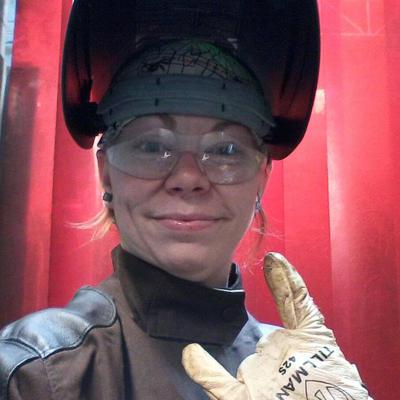
by Sonja Rogers
(Washington)
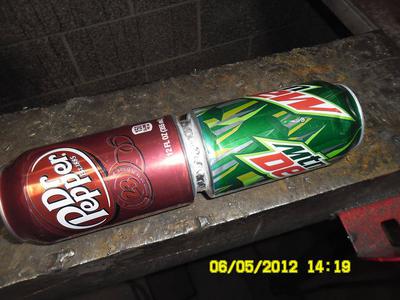
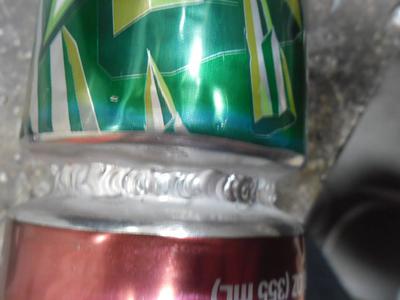
Two Aluminum Cans Welded Together

Two Aluminum Cans Welded Together

Here's how Sonja welded two aluminum soda cans together (and below this is another technique you may want to try):


I used 1/16" tungsten electrode, on a miller dynasty 200. I was using aluminum mig wire, 5/64" thick as a filler rod. I started out at 20 amps, and the trick to not blowing a hole thru the can is to start the arc on the filler wire.

Once you get a puddle formed you go from there. I bumped my amps up to 25-30 and started running beads around a few at a time, turning the can between welds. This took me over an hour to do, including prep. It took a lot of skill I didn't even know I had.

Welding two cans together is not something everyone can do. An instructor at my school that has been doing aluminum welding for at least 15 years told me today that I am the first woman he has personally known to be able to do this and that I'm the first student to try it since he has been teaching.

I am so proud right now! This is something the experts have trouble doing! I am taking a welding technology course at a great tech college and I'm looking to get at least 3 different certs and a aas degree. Ive only been in the program for 14 months.


Welding Aluminum Cans:


By: PERRY
From: DAYTONA, FLA

I have tig welded a lot of aluminum. I was bored one day and started welding two aluminum soda can bottoms together. After many many tries I finally got it. The trick is not to start your arc on the can. The heat needed to burn the rod is to much for the can. It will burn through the can. Touching the can with your rod, drip a wad of aluminum by applying the heat to the rod first. Dip your starter puddle then work off the puddle. Continue around applying arc to the puddle not can. After learning this technique their is no such thing of it's to thin to weld.

Comments for Welding Aluminum Cans

Average Rating starstarstarstarstar

Click here to add your own comments

Dec 04, 2013
Rating
starstarstarstarstar
TIG WITH MIG WIRE
by: LARRY BOYD

Sonja, here's a trick I learned from a good friend. If you want to use MIG wire for TIG welding find a SAFETY WIRE PLIER. Cut a length of mig wire. Clamp one end in a vise clamp, and the wire plier to the other end and twist it a few times. Now you have a straight wire to tig with. Hope this helps everyone.


Dec 03, 2013
Rating
starstarstarstar
Weld the side walls
by: Brad Hazlett

Now that you have the basics down, try welding the side walls. Remember that your flame should not touch the can until you have enough filler metal on it.

Jul 12, 2013
Rating
starstarstarstarstar
Spot weld alum.
by: LARRY BOYDAnonymous

Saw this on youtube. I tried it and it worked. I used 18 gauge Aluminum 4" wide bent into angle shape, put pieces back to back, then used 24 gauge sheetmetal on each side of Aluminum to protect it.

I've got a Dayton 220V spotwelder with Miller timer. I used 2 5 second hits for best results.

The sheetmetal protects the surface of the Aluminum from excessive heat, but it worked great. You will need to pry the metal off Aluminum, as it sticks from the heat. Hope this clear to all.

Jan 23, 2012
Rating
starstarstarstarstar
aluminum stick welding with inconsistent beads
by: Anonymous

Aluminum stick welding problems with inconsistent weld beads across the joint sounds like you may need to keep your arc in the leading edge of the puddle at all times. The arc is penetrating into the metal, and in order to get 100% penetration, must be carefully manipulated at a consistent and calculated speed so as to keep even penetration through the entire weld joint. Drag the puddle along with a zig-zag or arcing motion pausing on each side of the plate momentarily as needed for good penetration, but keep the arc "IN" the puddle and at the leading edge of the puddle at all times, do not jump out over the leading edge to start another puddle. The weld puddle must flow along all the way to the end of your joint. I prefer the cresent moon shape it gives a better weld. The more heat the faster the travel speed, learn the techniques at a lower but satisfactory amperage, then turn up as you gain confidence and ability. Hope this helps, cheers, yar

May 14, 2011
Rating
starstarstarstarstar
aluminum stick
by: Anonymous

i am haveing a little trouble with my aluminum stick weld i can weld it perfect flat on the alumihum but when i put to pieaces together it doesnt look quit right i get the beads dowm but there not uniform i get ins and outs lumps in my baeds what am i doing wrong ?

Apr 26, 2011
Rating
starstarstarstarstar
cans
by: Anonymous

so can you post a pic of the welded pop cans

Jan 06, 2011
Rating
starstarstarstarstar
Alumunum can
by: TIGMASTER

I started TIG welding at the age of 15 I am now 49 soon to be 50. the man who thought me in my family plan had me weld aluminum cans after my first clean weld on 1/16" plate butt weld. I used a .020 size tungsten and 5053 .060 rod and welded completely around on my 2nd try.

I use this example with kids to show them what may seem impossible at the time is very possible with time and knowledge.

Glad you did it

Dec 14, 2010
Rating
starstarstarstarstar
very educative
by: asajile sanga

Thanks for your information it is very educativ

Nov 23, 2010
Rating
starstarstarstarstar
GREAT!
by: Anonymous

Thanks for the info. I have not TIG, my machine is a cheap stick welder. Anyway, your experience encourage me to try non ferrous welding!

Nov 23, 2010
Rating
starstarstarstarstar
Good job!
by: Anonymous

Yes, I did that in College. I thought I was the only one that did that. After many tries and many cans I finally got 3/4 of the way around before burn through. That was enough for me. Later I cut the burn through out exposing the weld side view and its been a dust collector for many years. I did enjoy the tig welding the best.

Click here to add your own comments

Join in and write your own page! It's easy to do. How? Simply click here to return to Mig Welding Page.