How To Build A Workbench!
This is a really simple set of plans on building a quality workbench for very little money. It's something you'll keep around forever, and you might even sell a few.
MATERIALS REQUIRED:
- 34 feet of steel angle iron: 2 inches x 2 inches x 3/16 inch.
- 13 feet steel angle iron: 3 inches x 3 inches x ¼ inch.
- 1 inch Plywood. MDF or Particle board: 4 feet x 8 feet.
- 20 #10 flat head sheet metal screws.
- 4 adjustable leveling feet.
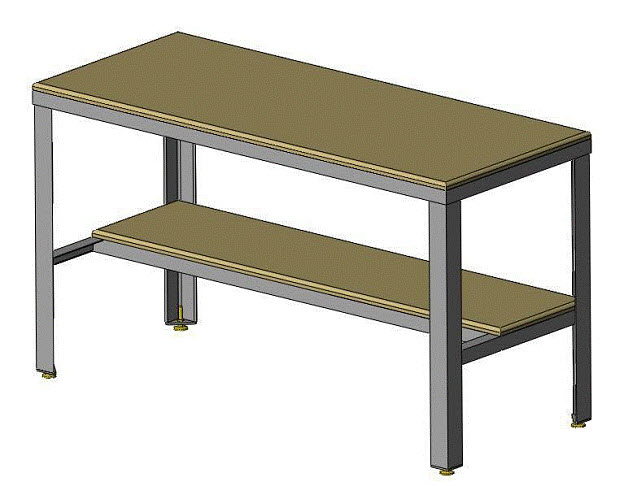
Workbench Drawing #1:

Parts List For Illustration #1:

Workbench Drawing #2:
This more detailed drawing the the metalwork of the bench will be satisfactory for more experience fabricators. But for a much more detailed drawing you can view this pdf. You can also get a very detailed 14 page guide for this bench here.

Parts List For Illustration #2:

Metalwork Construction Instructions:
Step 1: Cut items 1 and 2 as shown in drawing #2.
Step 2: Weld items 1 and 2 in a rectangular frame as shown below. This will make the work bench top frame. Make sure the frame is flat with squared, 90 degree corners.

Step 3: Cut (4) item # 5’s (part number WP-902-5) to the bench top frame from step 2. These will become the legs of the bench. Make sure they are all the same length.
Grind a chamfer at the top of each leg for clearance with the inside
radius of the bench top frame angles. This will ensure the legs will fit flush with the inside faces of the bench top angles and eliminate any gaps. Flip the bench top frame upside down and weld the legs perpendicular to the bench top frame in two directions.
NOTE: The bench legs can be made to any length you desire or require.
Modify the material requirements and cut list accordingly.
Bench Top Frame:

Grind Chamfer On Legs:

Step 4: Weld items 3, 4, 6, and 7 together as shown below, referencing this workbench drawing for dimensions. This creates the shelf frame that will be located under the bench top. Make sure the frame is flat with squared, 90 degree corners.

Step 5: Position the shelf frame as indicated on drawing #WP-902 and tack weld in place. Make sure the shelf frame is positioned the same distance from the bottom of each table leg before final welding. Weld as indicated on drawing WP-902.

Step 6: Weld 4 item #8’s (Foot Plate) to the bottom of the bench legs as shown below.
Note: The foot plates will need to be drilled through or tapped through,
depending on the specific mounting method of the leveling feet you are
using.

Step 7: Prime and paint the welded frame for rust prevention. Allow the paint to dry completely.
Step 8: Paint or varnish the wood surfaces if desired.
Step 9: Clamp the wood bench top and shelf boards to the welded frame, taking care that the edges line up. Using an electric drill and a screw driver bit, screw the boards to the frame with the self-tapping screws. Position the screws approximately 1 ¼” from the edge of the board and approximately 8-10” apart. The flat head of the screws should be flush with the top surface of the boards.
Step 10: Attach the leveling feet to the bottom of the bench legs.
Completed Workbench!

Like I said above, this step by step guide should be just fine for most but if you want more information on the build and better blueprints you can get them here. Thank you for your support.
Recommended:


Welding Plans:

New! Welding Table
New! Log Splitter
Top Projects:
