Build Your Own Adjustable Campfire Grill!

This DIY adjustable campfire grill project is a good one for those of us who like to go camping and want a good grill to work with.
It's also a good grill for your backyard because you can set it up instantly, and since it's adjustable you can get some good grilling going regardless of how big the flames are (to a point).
As with all of our welding projects, we have a PDF version that is part of a bundle of all of our plans. They may be easier to follow. But if you are an intermediate or advanced fabricator you should do just fine with the directions and drawings below. And if you feel there is something missing let me know. Have fun!
Materials Required To Fabricate The Campfire Grill:
- (5.5FT) Hot Rolled Steel Square Tube, 1” X 1” X .12” (11 GA).
- (6.5FT) Hot Rolled Flat Bar, 0.75” X 0.25”.
- (27FT) Hot Rolled Flat Bar, 0.75” X 0.125”.
- (2.25FT) Hot Rolled Round, 3/8” diameter.
- (1FT) Wood Rod, 2” diameter.
- (QTY 2) 3/8-16X7.5 LG. Socket Head Cap Screw.
- (QTY 4) 3/8 Flat Washer.
- (QTY 2) 3/8-16 Hex Nut.
- (QTY 4) Lock Washer.
- (QTY 4) 1/4-20X1.625 Hex Bolt.
- (QTY 4) 1/4-20 Hex Nut.
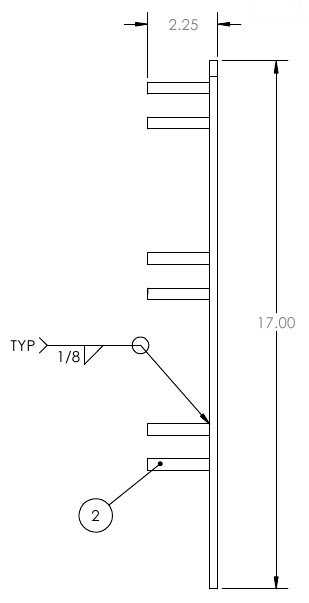
Refer To These Part Numbers and Descriptions As You Go Through The Directions and View The Weldments Below!
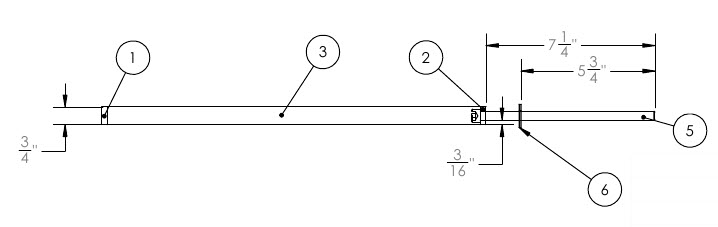
This lists the parts numbers for the grill arm:

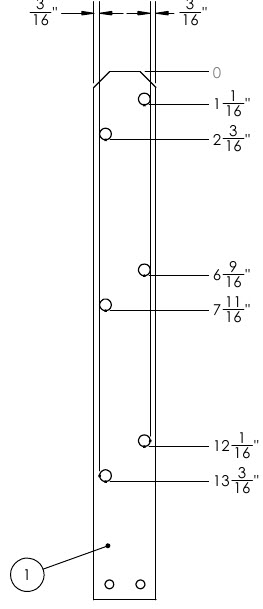
Grill base part numbers:

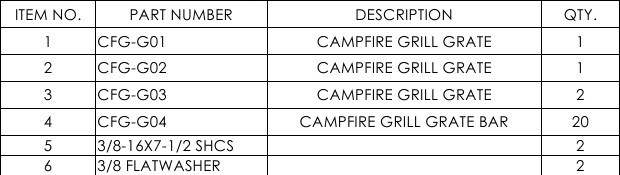
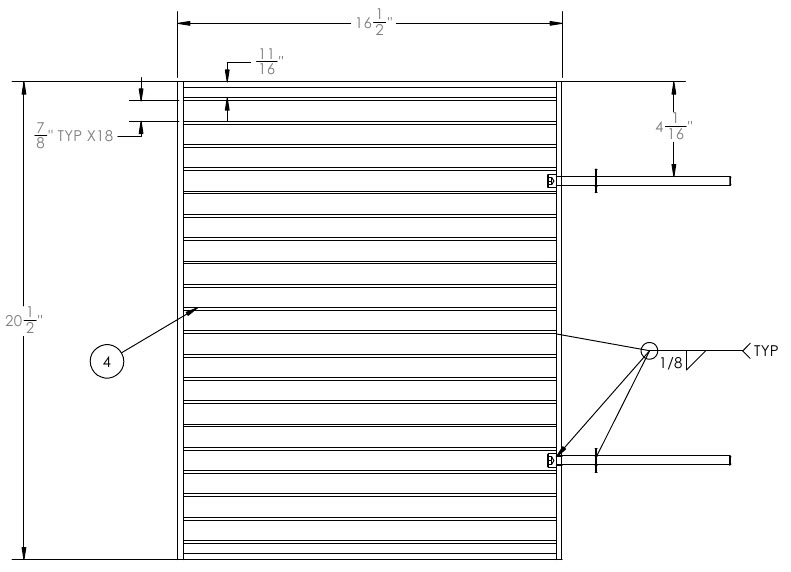
This is the list of part number for the grate:
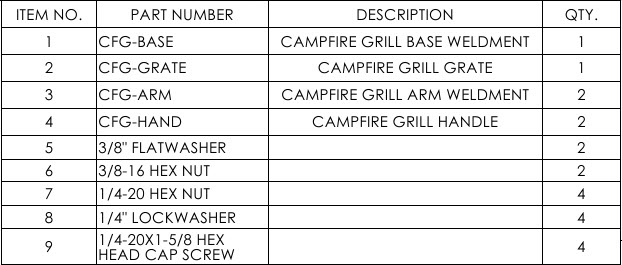
Here are the parts number for the main adjustable grill assembly:
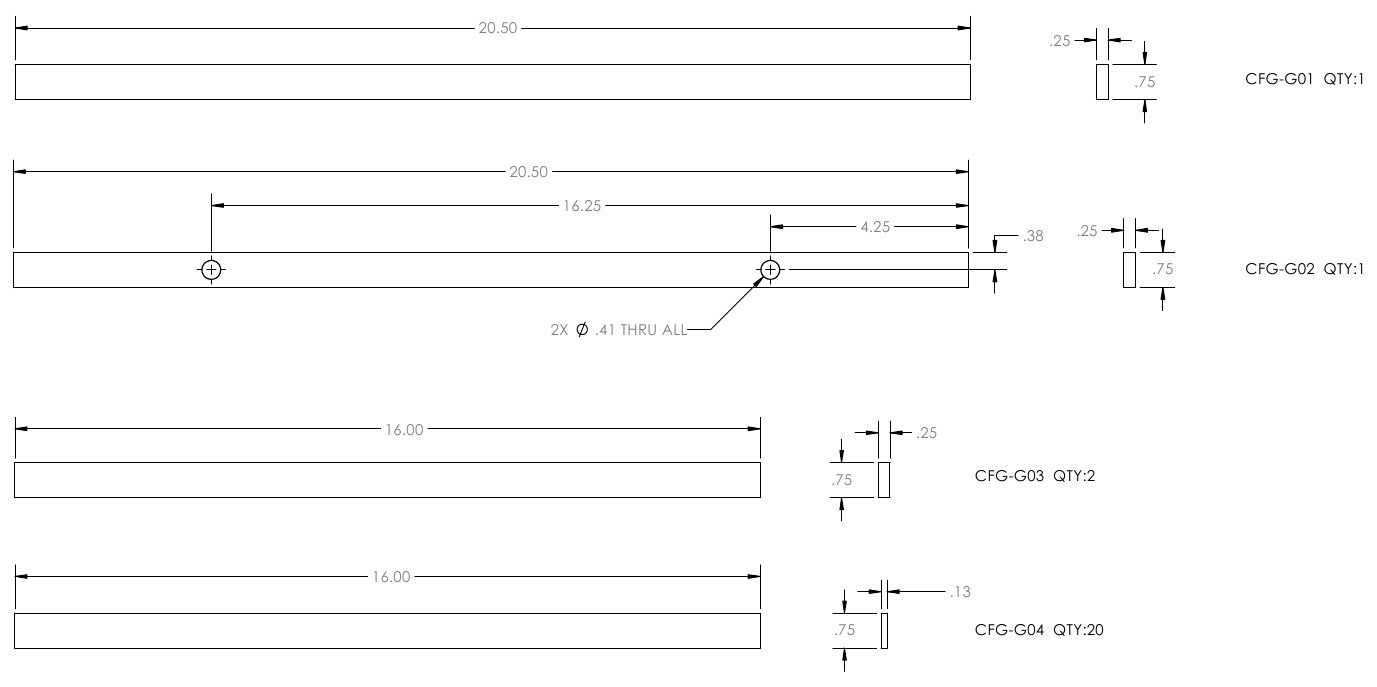
Cut Sheet For The Grill:
Click on each image for larger view so that you can see the measurements.

 |
 |


Step By Step Directions:
Here are the step by step instructions to building my adjustable campfire grill. Keep in mind that there is a PDF version of the plans that has more detail including the directions as well as the blueprints.
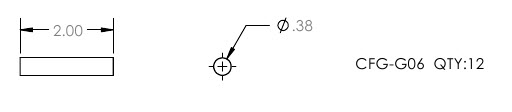
Step 1: Cut and machine part numbers CFG-G01 (qty 1), CFG-G02 (qty 1), CFG-G03 (qty 3), CFG-G04 (qty 20), CFG-G05 (qty 2), CFG-G06 (qty 12), and CFG-04 (qty 2) according to the CUT SHEET above.
Step 2: Gather parts CFG-G01 (qty 1), CFG-G02 (qty 1), CFG-G03 (qty 3), CFG-G04 (qty 20), 3/8-16X7.5 LG Socket Head Cap Screw (qty 2), and 3/8 Flat Washer (qty 2).
Lay the parts out on the welding surface and position them according to the drawings below. Tack weld the parts in place and then double check alignment and right angles. After you are satisfied, complete all the welds.

Cross reference the numbers on the images below with the parts numbers listed above. Click on each image for a larger view if needed.
Step 3: Gather parts CFG-G05 (qty 1), CFG-G06 (qty 6). Lay them out on the welding surface and position them according to the drawings below. Tack weld the parts in place the double check alignment and right angles. Complete all the welds and then repeat this for other side.

As mentioned above, cross reference the numbers to the parts list above:
 |
 |
Step 4: Gather parts CFG-04 (qty 2) and the 1X1X0.125X21.25 long square tube. Lay them out on the welding surface and position them according to drawings of the adjustable campfire grill base below. Tack weld the parts in place and double check the alignment and right angles. Complete all the welds.


Step 5: Use high temperature paint on all the completed weldments if desired.
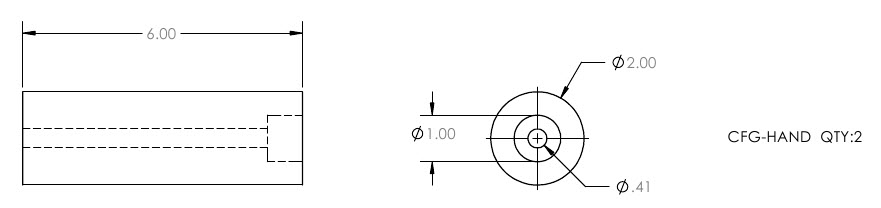
Step 6: Gather weldments for the adjustable campfire grill which should include the grate, the base, the arm as well as the following:
- 3/8 Flat Washer (qty 2)
- 3/8-16 Hex Nut (qty 2)
- 1/4 Lock Washer (qty 4)
- 1/4-20X1.625 Hex Bolt (qty 4)
- 1/4-20 Hex Nut (qty 4).
Lay all of these parts out on the welding surface and assemble them according to drawing below.

Completed Adjustable Campfire Grill!
Adjustable Grill Alternatives:

If you don't want to build your own grill with the plans above then you may want to buy one. The Pioneer 18 inch adjustable grill is pretty good for the money. It's not going to be as rugged as our grill, but it's a good buy, and the design is pretty good.
The Pioneer grill has a circular grate with raised sides so that the food doesn't fall off unless you had to many beers and then it slips from your tongs.


Welding Plans:

New! Welding Table
New! Log Splitter
Top Projects:
