MIG Welder Setup and Tips!

In this tutorial we will go over the basics of a MIG welder including wire set up and gas set up for a typical MIG or GMAW welding machine.
A MIG or GMAW welding machine is a wire feed machine. There are many different types.
The wire feed process has become the standard of the welding industry.You will find MIG welders in homes, shops, and farms all around the world now because the industry has made these types of wire feed machines less expensive and much smaller than they used to be.
There are also many types of manual and automatic wire feed welding processes. But MIG welding or gas metal arc welding (GMAW) is the most common because of it's ease of use while providing quality welds.
MIG welders use a continuous solid filler wire in conjunction with shielding gas, which is separate from the machine. This shielding gas protects the weld from contamination from the air.
Controlling the build up of the weld and the weld puddle is very easy a MIG welder, plus there is very little if any slag (unlike stick welding).
MIG welding or wire feed welding is easy but many metalworkers would say that it's easy to get started with MIG.
Arc Gap and MIG Welding!

One of the most important tips on welding properly is controlling the arc gap. The arc gap is the distance that the arc travels between the electrode and the metal.
When you set the wire speeds and voltage properly your MIG welder will maintain a constant arc gap automatically. And it does not matter if you make small changes in your gun position, it will adjust.
It's Not Just About Pulling The Welding Gun Trigger!
As I mentioned, the MIG welder maintains the arc, feeds the wire consistently, and provides the shielding gas. And this makes this process easy to learn, but you still have to control the position of the welding gun, the direction of the weld, and the speed of travel.
In addition, you have to understand how to prepare metal for welding, and joint fit up to make good welds.
Inside The Machine!
A wire feed welder has several important parts and features you should be familiar with.
A power source:

A wire feed unit:

A welding gun assembly:

A ground connection (clamp):

A high pressure gas cylinder with a flow meter:

About Polarity and Your MIG Welder!
Most welders that are sold for the average Do-It-Yourself welder, and for shops has the power source and wire feed unit combined.
However, for large operations they are separate. But whether they are combined or separate they all do the same thing because they have the same parts.
Wire feed or MIG welding machines are based upon a constant voltage direct current source of power (CV/DC).
Many MIG and GMAW welders use a transformer rectifier to change the
alternating current that comes from your wall outlet into direct current (DC) that supply
to the welding wire.
With DC power, polarity is determined by how the leads are connected to the terminals. Polarity is the direction that the current flows.
Welding wires are designed to run on a specific polarity. Most wires use direct current electrode positive. So the lead to the welding wire (the electrode) is attached to the positive terminal:

Wire feed also uses a CV or constant voltage power source; this is different from stick rod welding machine which uses constant current, while you're welding the voltage and amperage are always readjusting to keep the arc going and wire feed; this mainly happens when the gun is held closer or further away from the metal.
A constant voltage power source tries to maintain the voltage with the amperage varying to provide the current necessary to burn off the wire and maintain the arc; CV power sources stabilize quickly, allowing the drive roles to feed the wire a constant speed.
The whole
wire feed unit itself is fairly simple, there's a spindle to hold the
roll:
There is a catch that inserted into the back to the spool:

And there is a spring loaded nut which you'll find at the end of the spindle. What you do is tighten it so
that the spool stops when the drive roll stops. That way it will not continue feeding from
the momentum. You don't want to over-tighten or under-tighten this nut:

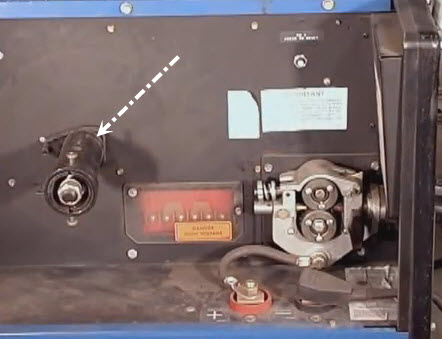
The wire should come from the spool fairly straight through a guide (A). And it then is centered in the grooves which are on the drive roll. It is then put through a steel liner which begins at (B), which continues through and inside the gun assembly:

The drive rolls on MIG and GMAW welders are created for specific wire sizes. You can see what wire size they take on the side of the role:

So when the drive rolls are closed you will tighten them just enough in order to prevent the
wire from slipping:

The mig welder gun assembly has a steel liner as well as a hose from the shielding gas. In addition there is a welding lead which provides the current all the way to the contact tip where the welding wire is energized, and there is also control wires which are part of the trigger assembly.
And finally, at the the end of the gun there is an insulator, an adapter, a contact tip, and the nozzle.

Contact tips come in different sizes to match the wire diameter and also in different lengths.
For gas metal arc welding the contact tip should be nearly flush with the end of the nozzle:

Installing a new role of wire? Then what you want to do is after you put it into the liner and you close and tighten the drive rolls close it up. Then turn on your machine, make sure the lead to your welding gun is somewhat straight to avoid jamming, and then pull the trigger.
- Tip: You should have the nozzle and the nozzle tip off of your gun until you put the wire all the way through.
There is a very close tolerance between a wire diameter and the opening in the contact tip:


How To Set Up A Mig Welder With Gas!
Lastly comes time MIG welding shielding gas bottle and the flow meter.
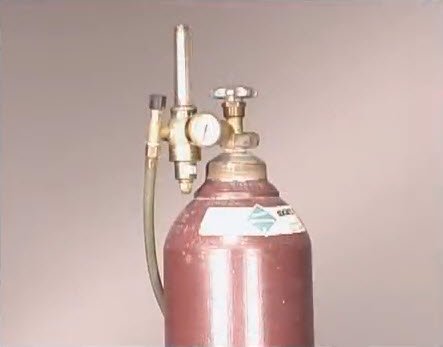
A typical shielding gas cylinder is a a high pressure bottle which can be filled up to over 2000 pounds per square inch. And protection of the cylinder valve is important, so keep a close eye on it:
The shielding gas bottle must be chained up. And if you are not using the bottle or if you are going to move it put the protective valve cover on whether its full or empty.
On the shielding gas bottle is a flow meter which is used to regulate your gas flow. Gas flow is measured
in cubic feet per hour (CFH).
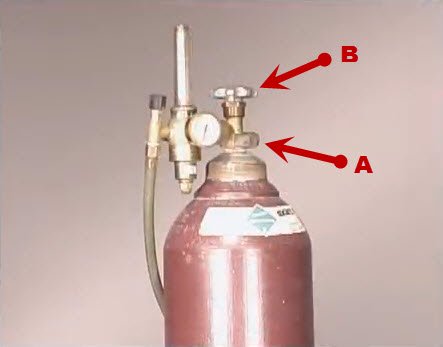
There are a few different types. Usually though you'll find one pictured below. This one will have a pressure gauge which gives you the pressure inside the bottle (A), and the other
gauge is used to adjust the flow of gas (B):

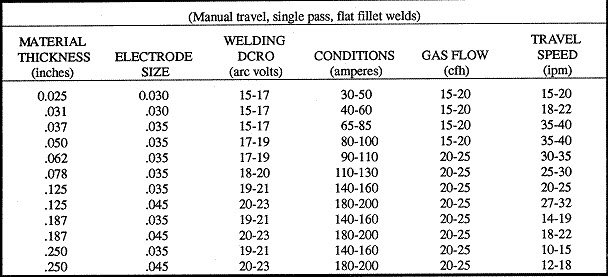
Suggested Wire Size For GMAW and CO2 and a Wire Stick Out of 1/4" - 3/8":
When you open your shielding gas bottle be sure to stand away and behind the valve. Do this in the even that there is something loose or comes off. Open or crack the valve slowly, and the open it all the way.
High pressure
valves have two seats. One closed the bottle (A) and the other seals
the valve stem when the bottle is open (B):
To get a more accurate reading and therefore to adjust your gas flow pull the welding gun trigger. The ideal amount of gas is the right amount that it takes to cover your weld. But you don't want to much so that you don't waste gas. This is usually about 20 CFH.
Also, if you have to much gas it will cool your weld too much, and if you don't have enough you'll allow gas pockets to form which is a big big problem.
Now that you have the right amount of gas set you are ready to weld!
Be sure to get on our list so that we can send you more welding tips, tricks, and project ideas.
Recommended Articles:
Copyright WcWelding.com All Rights Reserved.


Welding Plans:

New! Welding Table
New! Log Splitter
Top Projects:
