How To Build A Trailer!

There are many different ways to learn how to build a trailer. This guide is a step by step tutorial on how a builder can build a basic trailer at home in your garage or backyard.
You can build your trailer exactly how we did, or you can take bits and pieces of the tutorial and adapt your techniques as you go. We all have different training and skill levels and how you apply them is up to you.
But the main objective is to teach someone with basic metalwork skills how to build a trailer, and I think we accomplished that here. Let us know what you think!
Trailer Parts:
There are lots of new and used trailer parts that you can buy locally and online. I am just going to show you what we have so you can get a good ideas as to what you'll need and then you can find the parts you want for your build.
If you have a recommendation, supplier, or tips on how to build a trailer post it here.
Trailer Undercarriage Parts:

Since you may purchase parts from another supplier your parts will look different but they will work the same way.
- 3500 pound 4 inch drop axle: This axle can handle up to 3500 pounds of weight. You can buy straight ones and you can also get 4 inch drop axles that are 2000 pounds or below.
- We ordered a double eye spring for our trailer build but you can also use a slipper spring. In this picture we have two 1100 pound double eye springs. You can buy springs which have different weight parameters.. U-bolts and plate, one set for each side
- Plate and Ubolts for each side or our trailer.
- Spring hanger bracket. This is a weldon spring hanger but you can get bolt-on spring hangers with a bolt.
- You'll also need a spring shackle for the rear portion of your trailer, as well as a shackle hanger for each side. If you need them right away and you have some square tubing laying around that is 3/16 inch and .25 inch wall you can make a they can also be made from 3/16” – ¼” wall. If your trailer is a single axle spring shackles are used with a double eye rear hanger.
- A spring seat is welded to the axle and is placed between the axle and the spring. It is also called a spring perch.
- This is a coupler. It's can be welded or bolted to your trailer tongue. This is important because without it you can't attach your trailer to the tow.
- You'll also need some safety chains. These are an important feature that will keep your trailer from coming off the tow incase you make a mistake or it comes loose. Also, if you get pulled over and don't have safety chains you'll get a nice big ticket.
- You can use these quick links on your chain to easily attach them to the trailer tongue. Some people actually bolt or weld them on.
- A chain hook is required on safety chains in many states now so you might as well get them on if you are in a state that does not require them.
- These stabilizer jacks are not a required undercarriage trailer part, but they are a nice feature. You mount two of them on the back part of your trailer. Some builders like to mount them on the front as well. You will really appreciate them when you need to level out your trailer, or if you need more support for heavier equipment that you will load up a ramp.
Do you have any tips on how to build a trailer? Please share them here!
Overslung Versus Underslung Trailer Axles!
Underslung axles are the most common type of axle set up on trailers. Underslung means that the spring is put under the axle.
The reason for an underslung set up is to keep the trailer lower to the ground which may give it more stability.
Overslung axles are where the spring put on top of the axle, which raises the trailer.
Overslung Axle Setup:

As you can see in the image above we have the axle overslung. So the axle spring seat is above, and the axle actually rests on the spring perch (or seat).
If you use an overslung drop axle set up like this you need to be sure the spindles are upright when you mount them. It's considered to be the best way to set up a drop axle.
Underslung Axle Setup:

This image of an underslung set up has the spring perch above the axle and the spring is above. This setup also requires the spindles to be mounted upright.
The underslung axle set up gives you a little more height. It keeps your trailer from dropping as much as an overslung set up. Some pickups or RV's may need this height in order to attach the trailer. It also reduces dragging.
You can use the underslung or overslung set up on a straight axle, but an underslung set up is usually used on trailers with a drop axle which needs more height.

I am showing you both setups above to give you a better visual of what the two different setups look like on a drop axle.
The saw horses I used to place the axle on is actually level, and the Ubolts are resting on the sawhorses. It kind of gives you another visual of the difference you can achieve in terms of ground clearance.
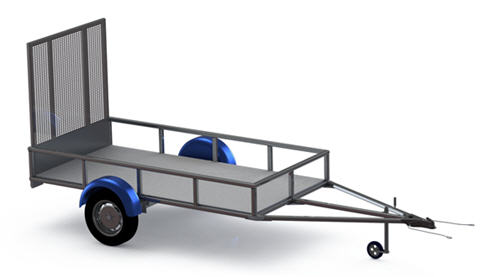
Building The Trailer Frame!
This image is of the actual trailer frame we built. It's will carry the actual trailer which will be fabricated for the top. There are many options with this trailer frame. You can build a simple flat back, fabricate a utility trailer, build a camper, etc.
Your trailer frame can be the same or different depending on what your goal is for your project. What material you choose for your frame will change the direction you go.
How To Determine The Dimensions Of Your Trailer Frame!
In a moment I will reveal how I came up with the measurements of the frame I built, as seen above.
There are several techniques for finding the length and width of your trailer frame. You may want to consult with your state laws in regards to trailer dimensions.
One way is to measure from the outside in, or inside out. For example, the trailer I built has a 4 foot 6 inch interior.
- Step 1: I want a 54 inch wide interior with a mattress that fits this size.
- Step 2: In addition you need to include a wall thickness and multiply that by two. For example, .25" outside, .75 inch frame, and .25 inch inside equals 1.25 inches x 2 = 2.5 inch walls.
- Step 3: The distance between the tire and frame is called tire clearance. So I want at least 1 inch on both sides. Multiply this by 2 and we get 2 inches.
- Step 4: The tire offset from the hub face to the backside of the tire is going to be about 4 inches. Multiply that by 2 and we get 8 inches.
- Step 5: You can order an axle based upon the measurements from hub face to hub face.
- Step 6: If you want a wood trailer perimeter on the chassis you can weld some perches for screwing screws into the wood.
Summary: 54 inches + 2.5 inches = 2 inches + 8 inches = 66.5 inches. 67 inches is what the hub-face-to-hub-face is going to be.
Get the plans for this utility trailer.
What If You Have A Hub?
- Step 1: Measure the hub-face-to-hub-face. For example, if it is 72 inches...
- Step 2: Minus the offset of the tire and wheel. For example, if it is 4 inches from the hub face to the backside of your tire, multiply that by 2 and you get 8 inches.
- Step 3: Minus the tire and wheel clearance. Mine came out to 1 inch on each side which is a tight fit. So if we multiply that by 2 we get 2 inches.
- Step 4: Now, minus the trailer
wall thickness. So if we have .75 inch walls we get 1.75 inches because
we have to multiply that by 2.
- Step 5: The number you get from these calculations will result in what the interior width will be for your trailer.
Summary:
72 inches minus 8 inches minus 2 inches minus 1.5 inches EQUALS 60.5
inches of interior width. You can fit a queen size bed mattress in
there.
About Perches and Spring Seats!
If your perches (or spring seats) are welded on your axle then what you want to do is get the dimensions from the outside of the perches because this will provide you with the measurements for the outside width of your frame.
To make the spring hangers fit properly you will need to place the perches right under the frame rails.
In some cases springs are cut off or not welded so the dimension of the frame measured from the outside will dictate where the perches will be placed on the frame.
A 4 foot wide trailer is as wide you can go in terms of the outside measurement of the trailer body if you want to keep building materials at a minimum.
What you will want to do is include the tire and
wheel clearance plus the tire and wheel offset to your 48 inches
hub-face-to-hub-face, and then get an axle based upon that measurement.
If
you get tires that are wide or low profile you are going to need more
space from the hub face, and you may have to build a narrower frame.
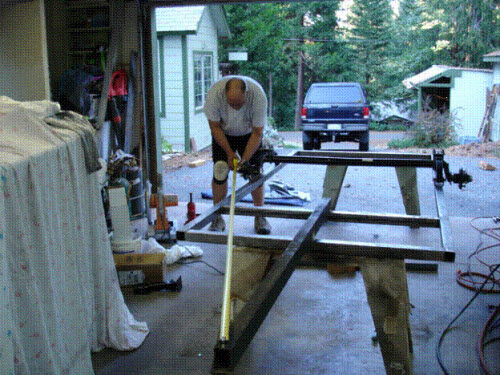
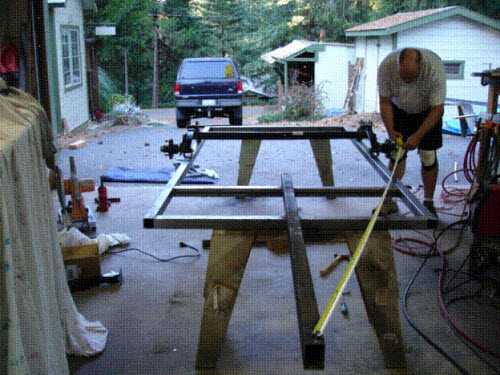
Trailer Frame Perimeter:

Lay out the perimeter of your trailer frame and get it square.
You can clamp the frame perimeter and then measure it from one corner to the other. You can double check with or use a framing square however I have found that using the tape measure this way is more accurate.
You can use a framing square too but it is not as accurate as the tape method.
Also, if you discover that your side rails are bent you'll find that it's difficult to square them up as well. So you can put one or two cross members (or x-members) in the frame prior to clamping. This will get your frame nice and straight and then it's easy to get squared.
Tack weld the corners after you square them up. Do not tack weld diagonally from each weld because you will not keep your joint and frame square. Also, keep your tack welds where you can get to them with a grinder, like far outside or inside of the joint.
After you tack weld the corners check and see if the they are still square. If they are then go ahead and tack weld on the other side of the joint.
Get Your Level!
It's now or never. You have to get your trailer frame level (flat). Because if you don't get it accomplished now it won't happen later and you are kind of screwed.
One way to do this is to get your frame up on some saw horses.
Use your level on the back rails and the front rails. The side rails are not as important in terms of actual leveling. You can use spacers (shim) when needed.
Check for squareness once you achieved a flat trailer. Then you can put in the rest of your cross members.
If you used a couple of cross members during clamping then you can go ahead and put in the remaining ones.
This is where you want to be sure you know where other features of your trailer are going to be. For example, do you want a drop floor or a water tank? Plan for those now.
Building Your Trailer Tongue!
The trailer tongue is very important, and what the measurements are going to be depends upon what you want.
A short trailer tongue will have a faster turning action while backing the trailer up. This can be challenging for many drivers.
A
long trailer tongue gives you the advantage of being able to put things
like a tank, racks, or even a bike on it. And it's also good if you
want to be able to lower a truck tail gate with the trailer attached.
My tongue will be four feet long. No jokes you sicko! I'll fill the space with aluminum diamond plate.

This is a good illustration of the types of trailer tongues you can build. Image source.
The trailer tongue was fabricated from a 6 foot piece of 3 inch x 2 inch rectangle tube, .125 inch.
I want the tongue to join the front piece and the second cross piece from the front member.
I'll get more stability if I put the trailer tongue underneath the trailer frame and joining it to the second cross member. To do this I use basic squaring techniques to get the right location for it. At this point you simply clamp it down on the first and second cross members, where it's going to be attached.
Then, do some tack welding starting from the back and work to the front.
What you'll need to do now is get some scrap metal and make some gussets which you'll weld the tongue to the frame. Gussets are important for support, strength, and they keep the tongue from twisting.
You can .25 inch plate, or you might get away with 1/8 inch as well.
Tack weld the two gussets onto each cross piece. After you tack weld them, finish your welds by starting from the back to the front, and then finish your bottom trailer frame welds as well.
Gusset Welds:

'A' Frame Cross Members?
For more support you may want to weld in some A frame cross members. They are not necessarily required but if you're going to have more weight on the frame they are a good idea.

To fabricate the A frame cross members as seen above, I used 2 inch x 2 inch x 1/8 inch angle iron. I attached them behind the coupler and on the ends of the second cross member.
If you have a cutting torch or a reciprocating saw, you will make better cuts on these due to the angle. You can use a chopsaw but it will be challenging. Also, the rougher the cut the poorer your fitting will be, and therefore you'll need to do more welding and cleaning. As usual, use your grinder to make your job easier here.
Here's how I work on this part: I tack weld them, and then turn the frame over and do some heavier welds on the back side. Then I flip the frame back over and do some finishing beads on the top.
Although these welds are not as strong as the ones on the bottom that's ok because the bottom welds have enough strength that I can get away with prettier but weaker beads on the top. Most of the strength will be from the bottom. But that's just me! Do as you want here.

Coupler Installation!

First, you need to figure out what size ball you want for your coupler. Then you need to install it.
When you buy a coupler make sure you get one that fits the type of tubing you built for your trailer tongue. You can bolt it on or weld it on.
If you bolt it on I recommend you use grade 8 bolts because grade it is the strongest you can get.
Why bolt it on? Because if you weld it on and you need to take it off you'll need to use a cutting torch.
Tips On Trailer Safety Chain Installation!
.24 inch chain link is a commonly used size for a safety chain. You can buy them almost anywhere but a trailer parts store usually has them ready to install.
You will weld or bolt the chain on to your
tongue. Another way to go is use a coupler that is threaded. Weld the
threader coupler to your trailer frame and then put the chain on. If you
weld your coupler on be certain that it is shut because the heat from
welding will mess it up.
Another option is to weld the chain on both sides of the trailer tongue.

If you bolt it on be certain you use a grade 8 bolt as described above.
The only tip here in terms of placement is to make sure there is not too much or too little length because you don't want the chain dragging, and if it is short it will cause a problem when you make turns.
Also, there are different laws in regards to how chains are set up from State to State. So check your state laws for trailer safety chains. For example you may need spring clips and/or they may need to be crossed.
How To Hang The Axle!

Now you have yourself a solid trailer frame. So the next step in building your trailer is to install the axle.
Earlier we had your frame on the ground to figure out what the measurements were going to be for your spring perches. Some trailer axles have the spring saddles already installed and the width of the frame is already figured.
The way I did it is I put the axle on a table with some 4 x 4's underneath it because I am going to be doing a drop axle, so the trailer spindles will be down.
Here are the steps I took:
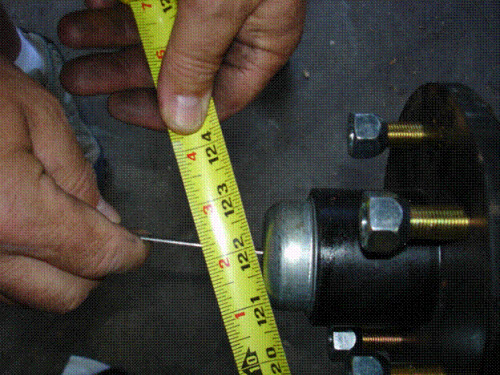
- Get the paint removed from the axle in the spot where the saddle (spring perches) will go.
- Next, get the measurement from hub-face-to-hub-face. Then, divide that number by two and this is where you want to mark your axle
- After that, get the measurement of the width of the trailer frame, and then divide by two again and mark these two spots on your axle.

The lockwashers mash up and break which make the ubolts loose later on down the road, so be aware of that.
- Find the saddles (perches) and use a level to get them leveled out and then tack weld them in place. If they are fine you can finish up the welds. Make these welds really good.
- When you install your axle you will keep your ubolts looe when you hang it. But you want them to be a little bit tight so that it just holds it.
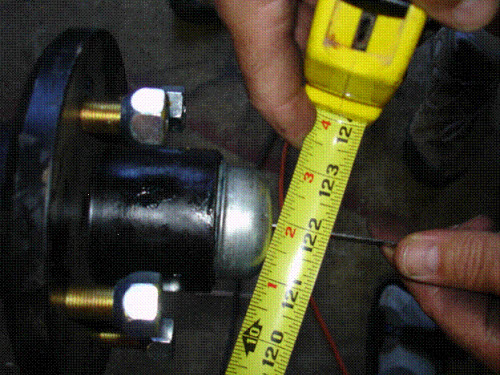
- Get a square piece of metal or a ruler of some sort and use it to measure from the straight edge to the trailer frame by holding it up against the front of the axle, and make it stick up so that you can get the measurement.
- Repeat on the other side.
- Get the trailer axle as close to center as possible and then tighten the U-bolts. Tighten them diagonally for better results. Double check your measurements throughout the tightening process to be sure you don't mess anything up as you tighten.
- Almost done! Put the springs in to the spring perches. The springs will sort of drop down because you are installing them upside down.
- Put the spring on - the bent part of the spring plate will be aligned with the springs.
- Install the locknuts and washers by pushing the ubolts from the back part of the trailer axle and then through the spring backing plate. Then tighten the bolts.
Next step is to put the front spring hanger on. Use the right bolt on the front hanger along with the nut and bushing. Hand tight should be ok.

These are spring hangers. the left ones are the the front hangers and the right ones are rear hangers that have a nylon bushing.

This image shows spring hanger installation. The hanger is welded to the frame already.
Now you want to mark out where you want to have the axle installed. Measure it out and then mark it off.
I like to put the axle on the frame after it's been assembled of course so that the springer hangers (the front ones) are sitting right on the tube.
You want to them check your dimensions so clamp it all in place.
You want to make sure that the measurement from both hubs up to the end of the tongue is the same. If it is, then it's centered. If not you have to adjust them with a small hammer.
You can be off by a tiny bit, but a well centered axle will make your tires last longer and your trailer will track better in tow.
Right Side Check:
 |
 |
Left Side Check:
 |
 |
Now that you got your trailer frame square it's time to get the front springer hangers clamped to it.
Check your axle alignment again. If things are good the front and the rear will be falling on the frame cross members. The hub centers are going to have the same measurement to the tongue, and the hubs should be centered in terms of the width of the frame.
If all is well then you can go ahead and tack weld the hangers. After you tack weld the hangers you should double check the measurements and then make you finishing welds.
One thing I do a little different is mount shackles in the opposite direction because if the trailer has a big load it won't drop down and stick.
When you install it, put the eye bracket on the trailer frame in order for both sides to have an identical angle in the shackles. Then, clamp down the brackets to the trailer frame. After you do that take out the nylon bushings, unless you have a bronze one. Then weld the brackets to the trailer frame (if the nylon bushings are in during welding they will melt).

So, now you have the axle in and all there is left is to bolt it up. Put the nylon bushings back.
There are lots of different types of bolts. You'll find that many have a shoulder, splined, or grease fittings. The nuts are usually the self locking kind.
In this trailer build I use the splined type. It's a shaft bolt. And I
install these bolts from the outside. I do this because if the nuts
decide to come off they will do so on the inside. Also, rocks won't
damage the threads.
You should tap the bolts into the front hangers, as well as the rear shackles.

Since I am using a splined type bolt I like to keep room for movement of the springs so I back the nut off just a bit in order to get this movement.
The springs need to be able to flex in the hangers. They must swing on the shackles as well as pivot on the front hangers. If you don't achieve this during assembly you will not have a suspension system.
Trailer Building Options!


You should get a stabilizer jack installed on your trailer. They are not expensive and easy to install.
A good brand that I prefer are the Atwood's. They are retractable and good quality.
You can also try a screw jack. A good screw jack will have more lift. More so than the Atwood. You can also use them to change your tire so keep the handle handy.
The way I install the jacks is I use two pieces of 1 inch x 1/8 inch angle iron and put it on the rear portion of the tear. This way I not only have the jack but it helps support corner. You can bolt or weld them on.
What I did was weld nuts and drill a hole and bolt (with locktite) the jack on this way.
Get A Trailer Jack Wheel!


A tongue wheel jack is very handy, especially if you think you'll need to move the trailer around. It'll also save your back!
There are several types to choose from. You can get a swing-away or fixed vertical. The swing away is the best.
You can get them rated for different weights. Go with anything 1000 pound or more. You can even get away with a 500 pound one.
The other consideration is the height of the jack. If you need your trailer level, and you will, you don't want one too short because then you have to put it on blocks to get it off the ball of your hitch.
Secondly, don't buy one that requires you to swing it down to use it. These are terrible.
Also, think about where you will be placing it on your trailer. For example, if you want it on your tongue then you need it to come up through the A frame you fabricated.
Or, if you want to put it on one of the braces then get it firmly in place as I did in the pictures here.
Jack Leg Stiffener:

Your trailer gets more stability if the tongue wheel is placed closer to the coupler.
The thing to look out for though is you don't want it interfering with the coupler or on being a problem on turns. Place it carefully.
You can bolt them on but I prefer to weld it on. So what I do is take off the mounting plate it comes with. Then I use the plate by welding it to the the A cross tube member. You can also buy plates from trailer stores that you can weld on.
The A cross member may want to tweak a bit because when you mount the tongue wheel on to the A member not only does the A member want to tweak but the jack may not stay in a vertical position. So what I like to do is fabricate a leg stiffener which will keep this from happening. It's kind of like a gusset...
A leg stiffener makes sure that the jack stays in a vertical position when you wheel the trailer across different types of terrain. Particularly rough terrain.
Build A Side Table Bracket!


I don't like a lot of stuff hanging off my trailers. And that goes for this cool advanced feature I built. A side table bracket. I put one on each side of the trailer for convenience.
This bracket allows the it to turn ninety degrees and it can go up or down depending on the height I want.
In addition the brackets are hidden under the trailer frame tear.
When you build the table get the right tubing because you want the leg of the table to fit inside the bracket you fabricated. You want it to fit snugly.
- Cut about 5 inch lengths of tubing.
- Drill holes that are approximately 5/8 inch in diameter on one side.
- Get a .5 inch nut over the hole you drilled and then weld it in place.
- Decide where you want your trailer table to go and then put the bracket under the frame in this spot.
- Weld the bracket in place.
- Weld a small piece of flat bar to the top of a 1 inch bolt. The idea here is to make your own wingnut so that you can tighten or loosen it.
Hidden Light Brackets!

On this trailer I put some sidelights on. But in addition to these lights I put some LED lights underneath.
So what I did was weld on tabs on each side, along with a bracket which is centered. And this is where I have three LED lights which act as running lights. This gives you extra lighting and therefore visiblity.
There are also two right turn lights and brake lights on either side as well.
When the lights are hidden under the frame, you give them more protection. And you can't see them if you are walking around the trailer, but if you are following in a car or truck they are highly visible.
The way I fabricated them is I used a piece of flat bar which is 1.5 inches x 1/8 inch, and then cut a forty five degree on either side. I then used a grinder to round the corners out and then weld them on the 2 x 2 inch tubing.
Trailer Building Tips?
Do you have any trailer building tips or tricks you can share?
What Other Welders and Metalworkers Have Said
Click below to see contributions from other welders and metalworkers to this page...
Trailer Tips and Questions! 
I was wondering where the axle should be in relationship to the trailer frame. Should it be half way from front to back or slightly to the rear.
I …
How To Get Your Trailer Aligned Properly!
This trailer building tip is not for the body but for the axle.
Lots of times people use the front stub axles off cars and weld a piece of square or …
Slider spring mounts Not rated yet
You need correct tongue weight for easy towing. If you will be loading different pieces of equipment, toys that have a different center of gravity. It …
Related Plans and Articles:
Welding Trailer Assembly/Fabrication.
Utility Trailer Assembly/Fabrication.
Copyright WcWelding.com All Rights Reserved.


Welding Plans:

New! Welding Table
New! Log Splitter
Top Projects:
