Sheet Metal Brake SMB48 Assembly Guide

Machinery and Tools Required For The Sheet Metal Brake Assembly:
- Chop saw or Angle grinder.
- MIG, TIG or Arc Welding.
- Welding equipment.
- Milling machine (recommended).
- Fitter's vise.
- Drill press.
- Drill set.
Sheet Metal Brake Build Materials List:
- Mild steel square table – 2x2x0.25” (24 ft).
- L-profile A284 steel – 3x3x0.3125’’ (50 in), L-profile A284 steel – 3x3x0.4375” (52 in), L-profile A284 steel – 1.5x1.5x0.25” (66 in).
- C channel – 5x6 (53 in).
- A284 steel sheet – 3 Gauge (52 in2), A284 steel sheet – 000 Gauge (35 in2), A284 steel sheet – 0000000 Gauge (40 in2).
- 0.75’’ round bar (5 in).
- Pipe – 1.5” (53 in).
Sheet Metal Brake Purchased Parts:
- (4) HNUT 0.625-11-D-S (you can probably get all these parts at www.mcmaster.com → Nuts → Hex Nuts).
- (4) HNUT 0.5-13-D-S (→ Nuts → Hex Nuts).
- (2) Washer FW 0.625 (→ Washers → Flat washers).
- (4) Washer FW 0.5 ( → Washers → Flat washers).
- (4) HBOLT 0.5-13x1.5x1.25-S (→ Screws & Bolts → Cap screws).
- (2) Wing screw Type A 0.625x3 (→ Screws & Bolts → Thumb screws → Wing Head Thumb screws).
- (2) Wing screw Type A 0.625x2.5 (→ Screws & Bolts → Thumb screws → Wing Head Thumb screws).
- (2) Spring 0.97x1.75 (→ Springs → Compression spring).
1. Assembling The Stand.
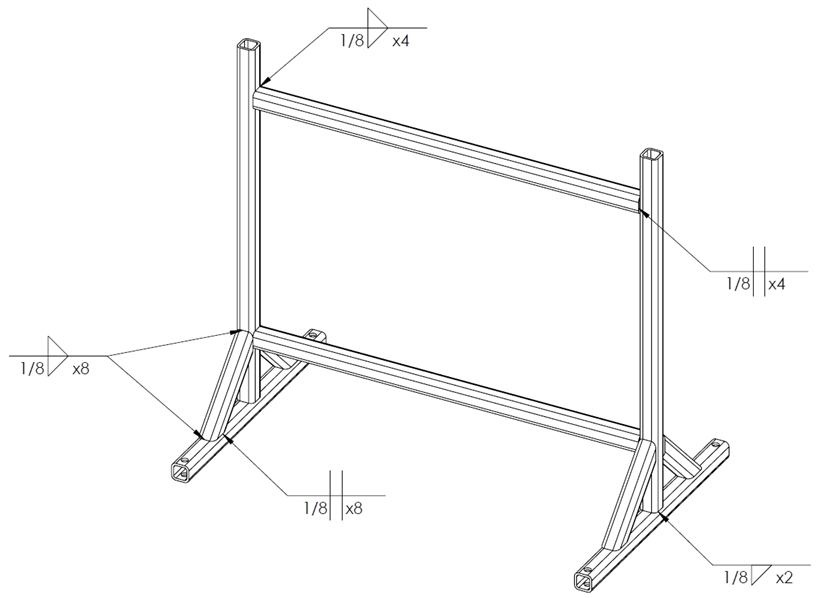 Fig. 1.1 Stand welding plan.
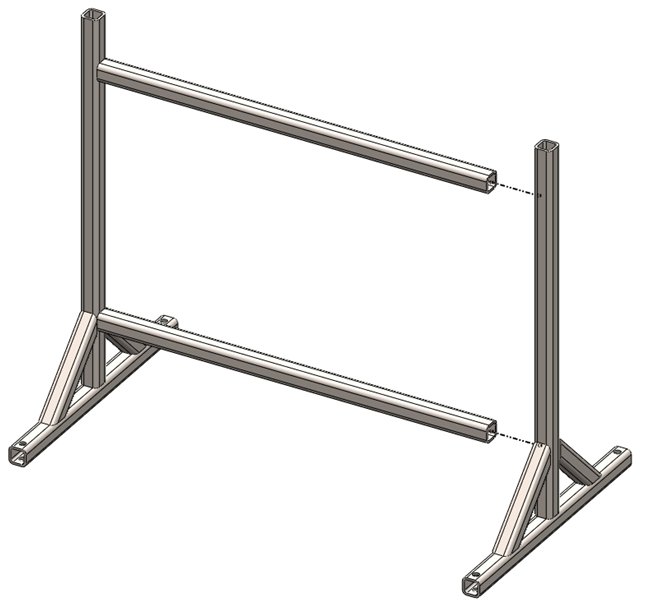
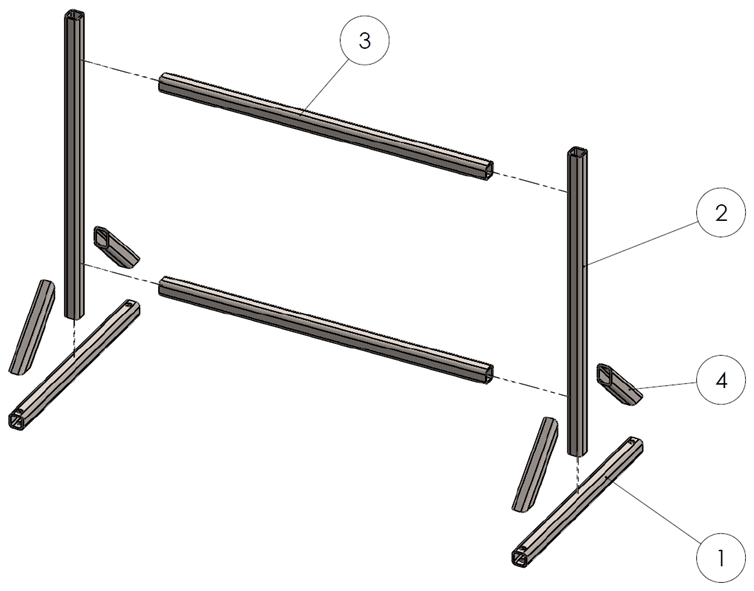 Fig. 1.2 Stand montage plan.
Parts:
- Square profile TS2x2x0.25x30 (SMB48 - 0.1.00.100).
- Square profile TS2x2x0.25x42.
- Square profile TS2x2x0.25x46.5.
- Square profile TS2x2x0.25x12 (SMB48 - 01.00.200).
Step 1:
Cut two 30" pieces of 2x2x0.25 square profile. Drill the 0.75" holes according to drawing SMB48 - 01.00.100.
Step 2:
Cut two 42" long piece of 2x2x0.25 square profile. Arrange the profiles on a flat working surface and tack weld them in place. Make two pairs of this type.
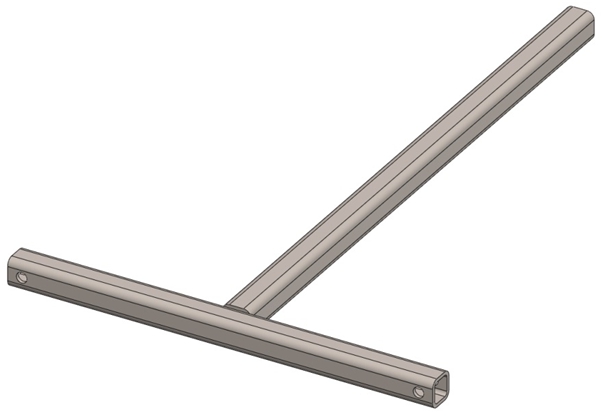
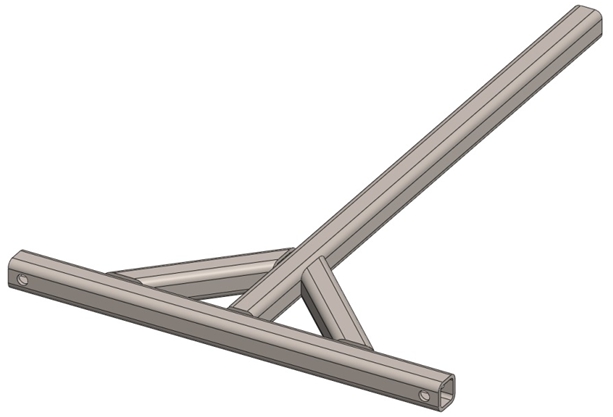
Step 3:
Cut four 12" inch long pieces of 2x2x0.25 square profile and shape the end to 45 deg according to drawing SMB48 - 01.00.200. Arrange the profiles as shown on the next picture and tack weld them in place. Check alignment and complete the welds according to the welding plan (Fig. 1.1). Repeat the step for the second pair.
Step 4:
Cut two 44.5" long pieces of 2x2x0.25 square profile. Place the profiles straight up observing the dimensions on assembly drawing SMB48 - 01.00.000. Ensure the right place and perpendicularity with fixtures and tack weld the profiles. Check alignment again and complete the square welds according to the welding plan (Fig. 1.1).
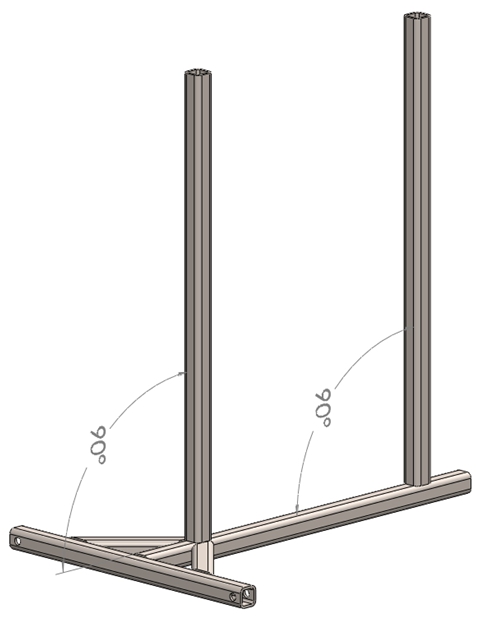
Step 5:
Arrange the assemblies from Step 3 and Step 4 on a flat working surface as shown on the picture to ensure that both faces of the profiles are aligned well. Tack weld both parts together and check alignment. If there is no gaps and the construction is stable proced to welding observing the welding plan.
2. Assembling The Bending Arm.
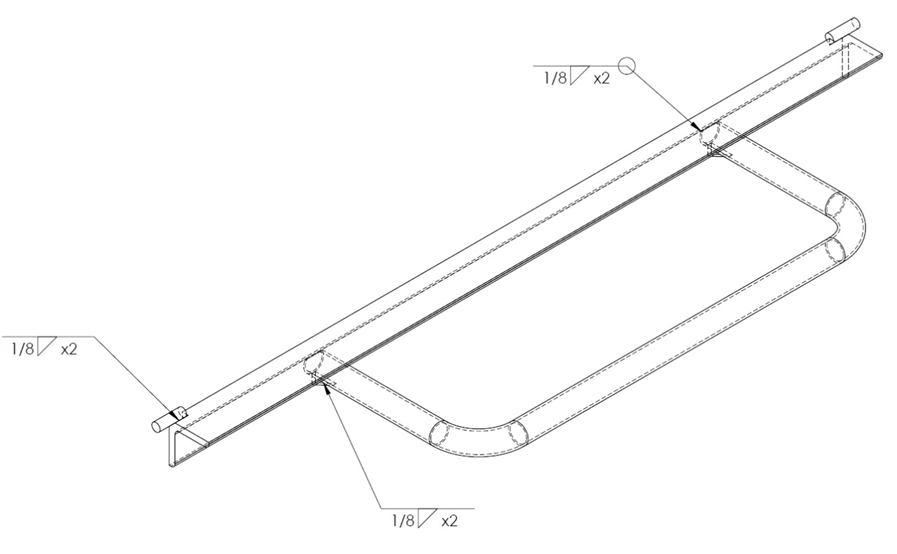 Fig. 2.1 Bending arm welding plan.
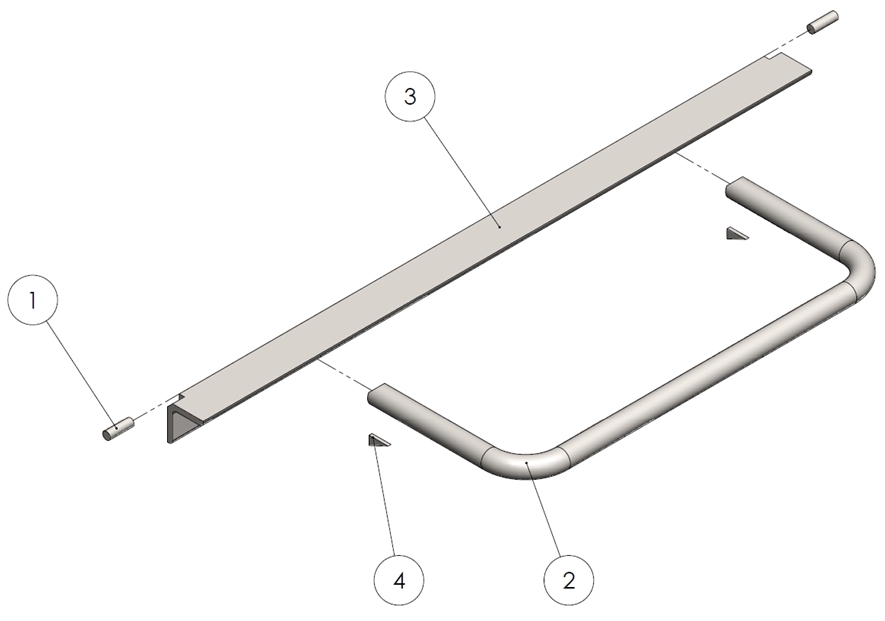 Fig. 2.2 Bending arm montage plan.
Parts:
- Pin (SMB - 02.00.100).
- Handle (SMB - 02.00.200).
- L3x3x0.4375x49 (SMB - 02.00.300).
- Rib (SMB - 02.00.400).
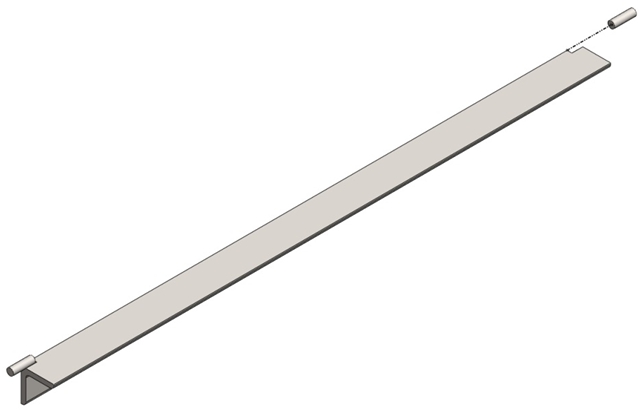
Step 1:
Cut 51" long 3x3x0.3125 L-profile and mill the lowering in both ends. If a milling machine is not available use an angle grinder to make the place for the round bars (see montage plan Fig. 2.2).

Step 2:
Cut two 2" long pieces of 0.75" round bar. Weld them in both ends of the L-profile.
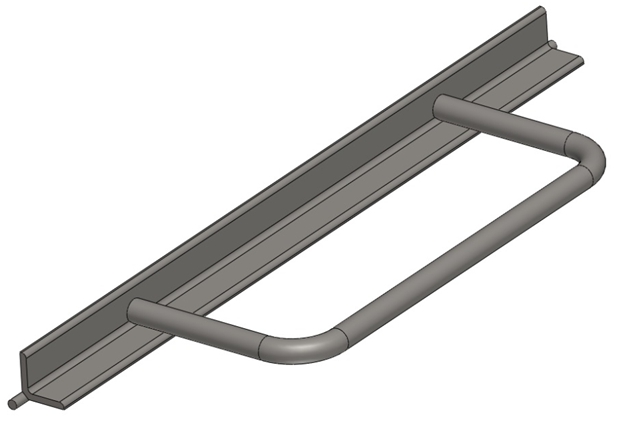
Step 3:
Cut four 53" long mild steel tube (1 ½”). Complete the bends according to drawing SMB - 02.00.200 and then cut both fillets.
Step 4:
Position the already bended tube exactly in the middle of the L=profile. Tack weld in place both parts.
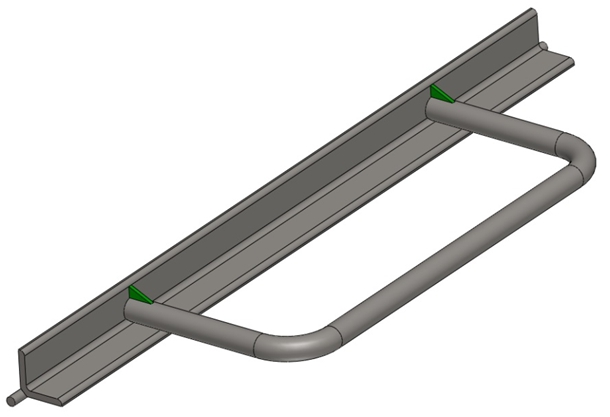
Step 5:
Cut two small triangle pieces to use them as supports (see drawing SMB - 02.00.400). Track weld the Ribs to the assembly. Check alignment of all parts and complete the welds according to welding plan. (Fig. 2.1)
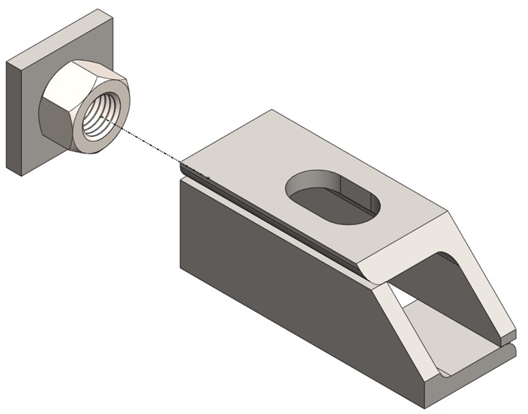
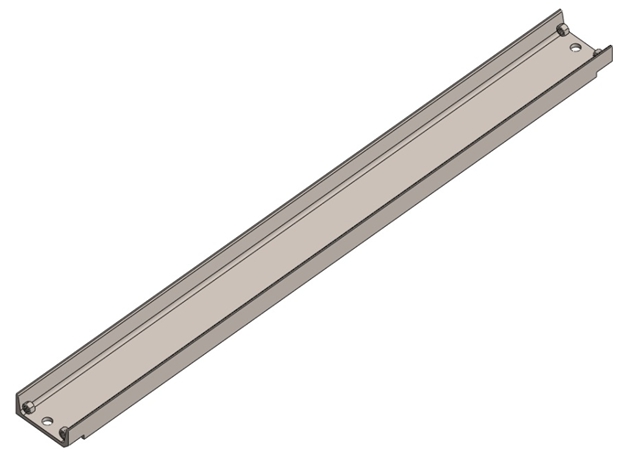
3. Assembling The Die.
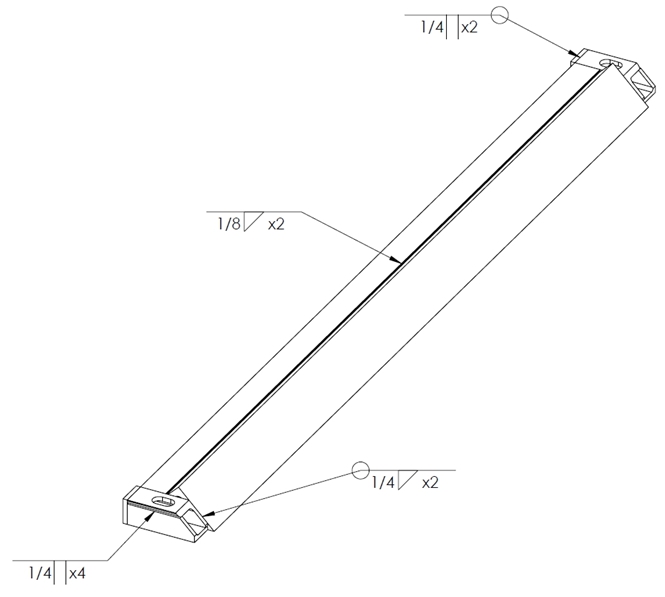 Fig. 3.1 Die welding plan.
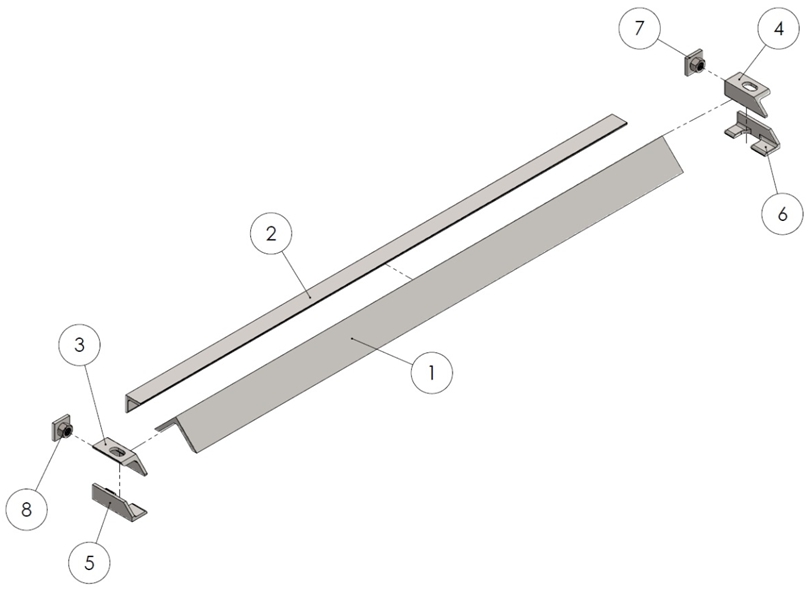 Fig. 3.2 Die montage plan.
Parts:
- Die (SMB48 - 03.00.100).
- L1.5x1.5x0.25x49 (SMB48 - 03.00.200).
- L1.5x1.5x0.25x4.5 (SMB48 - 03.00.301).
- L1.5x1.5x0.25x4.5 (SMB48 - 03.00.302).
- L1.5x1.5x0.25x4.5 (SMB48 - 03.00.303).
- L1.5x1.5x0.25x4.5 (SMB48 - 03.00.304).
- Plate (SMB48 - 03.00.400).
- HNUT 0.625-11-D-S.
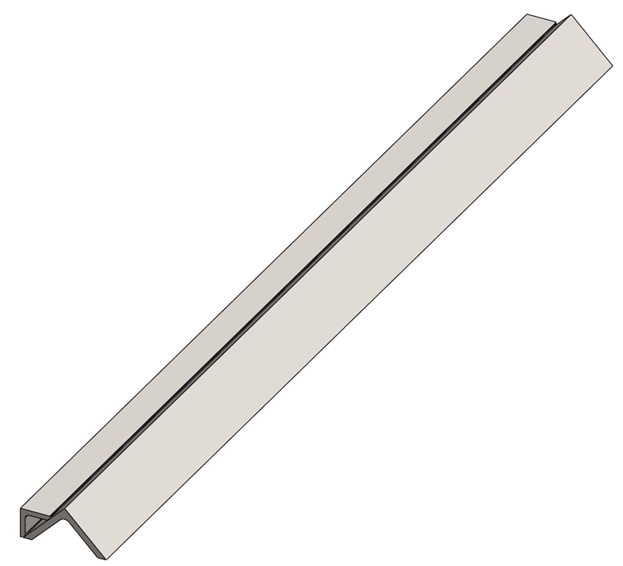
Step 1:
Cut 49" long piece of 1.5x1.5x0.25 and 3x3x0.3125 L-profile. Arrange them on a flat working surface as shown on the next picture. Ensure with fixtures and tack weld them in place. Check alignment and complete the welds according to the welding plan (Fig. 3.2).
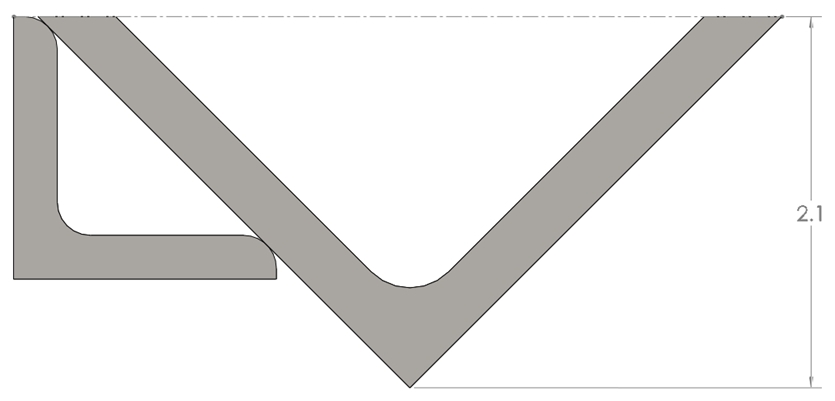
Step 2:
Mill the already assembled L-profiles to 2" height. If a milling machine is not available an angle grinder can be used to flatten the face.
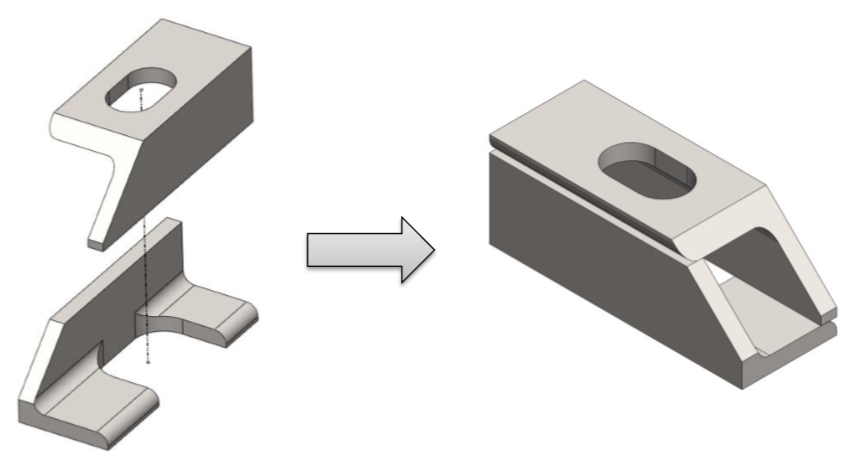
Step 3:
Cut four 4" long pieces of 1.5x1.5x0.25 L-profile. Cut the 45 deg angled sides and mill the slots according to the drawings SMB48 - 03.00.301-304. Note that there is a left and right assembly, so the parts have to be machined mirrored. Complete the square welds according to the welding plan (Fig. 3.1).
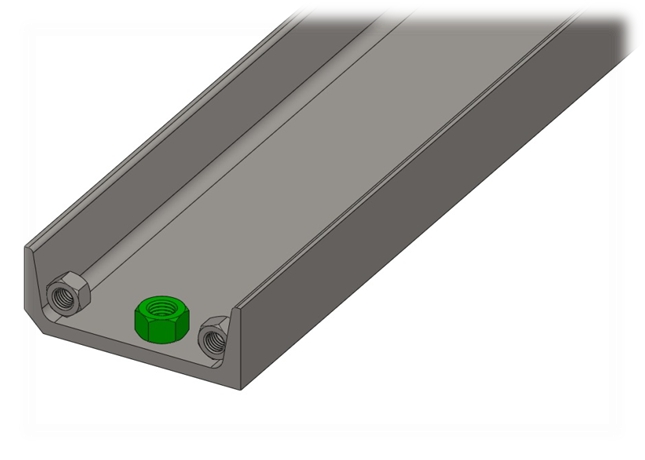
Step 4:
Prepare the back plate assembly with nut and assemble it to L-profile pair. Complete the square welds according to the welding plan.
Step 5:
Weld together the parts from Step 1 and Step 4 to complete assembling the Die. Make sure that bottom face of both assemblies are aligned perfectly.
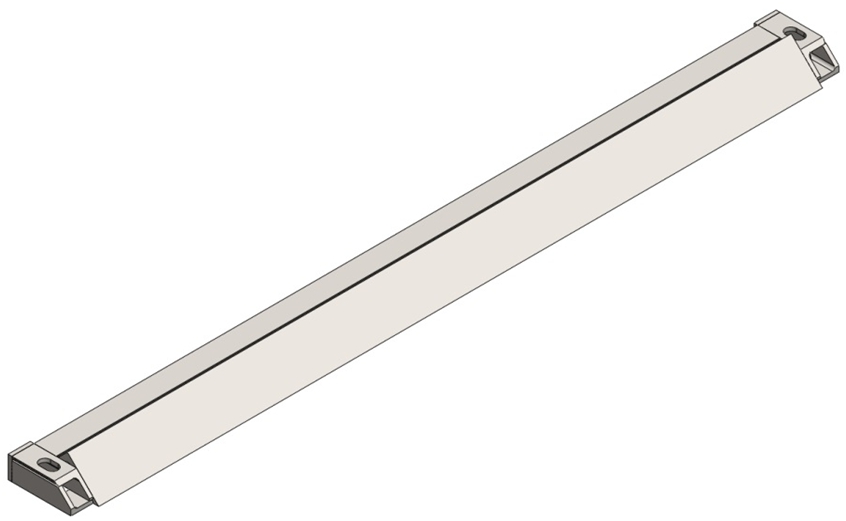
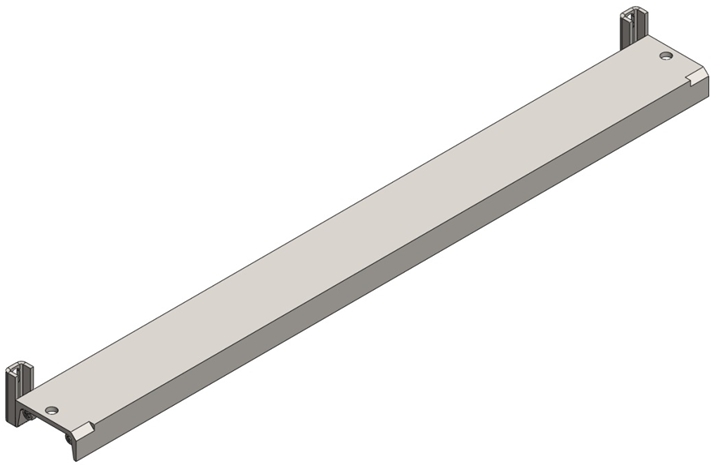
4. Assembling The Bending Bed.
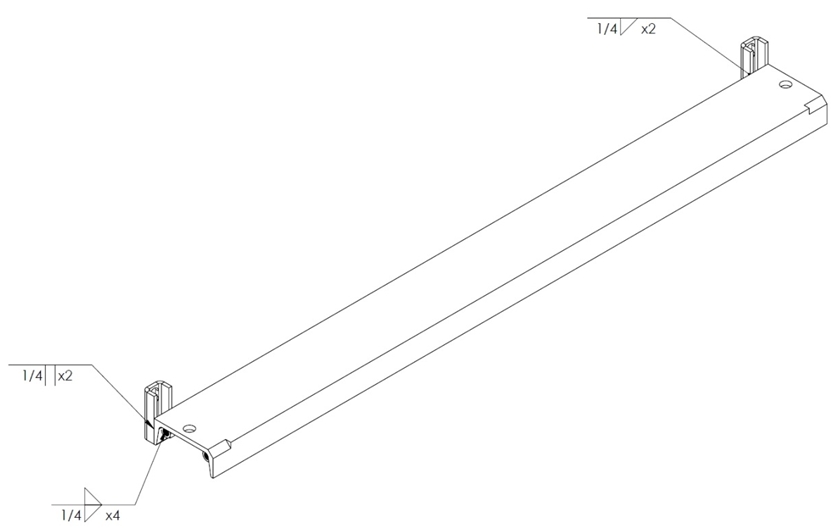 Fig. 4.1 Bending bed welding plan.
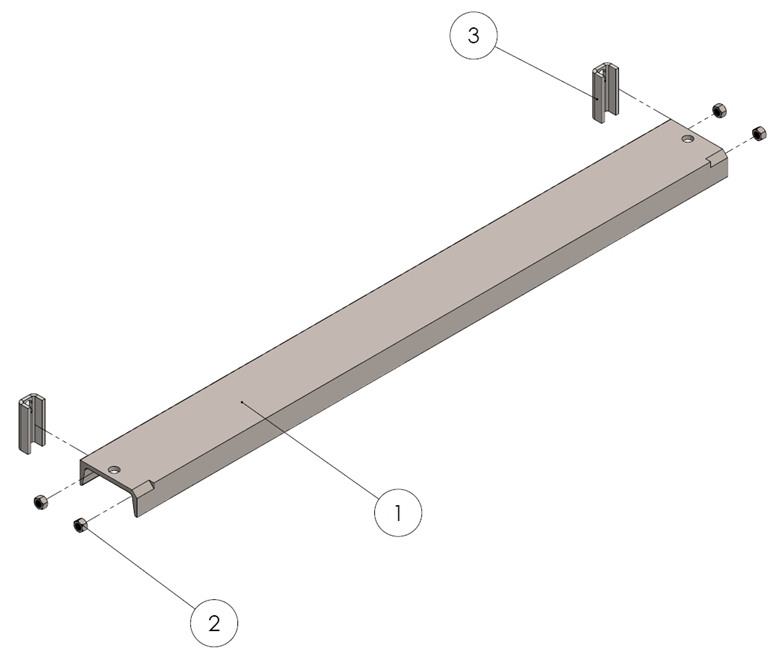 Fig. 4.2 Bending bed montage plan.
Parts:
- C5x9x52 (SMB48 - 04.00.100).
- HNUT 0.5000-13-D-S.
- Column (SMB48 - 05.00.000).
Step 1:
Cut 52" long piece of 5x9" C-profile. Mill the lowering in both ends as for the bending arm. Drill the holes according to drawing SMB48 - 04.00.100.
Step 2:
Take four 0.5" nuts and weld them to the C-profile. Leave a small gap between the end of profile and nuts. See the assembly drawing SMB48 - 04.00.000.
Step 3:
Cut two 3x3.5" pieces of 0.25" thick mild steel sheet. Machine the slot in the middle of the 3" side. Bend according to the next flatten drawing.

Step 4:
Place the C-channel assembly on a flat working surface and proceed to welding both parts to the C-channel. The outer square welds must be finely filed to zero.
Step 5:
Weld two 0.625 nuts concentric to the holes in C-channel.
5. Assembling The Whole Sheet Metal Brake.
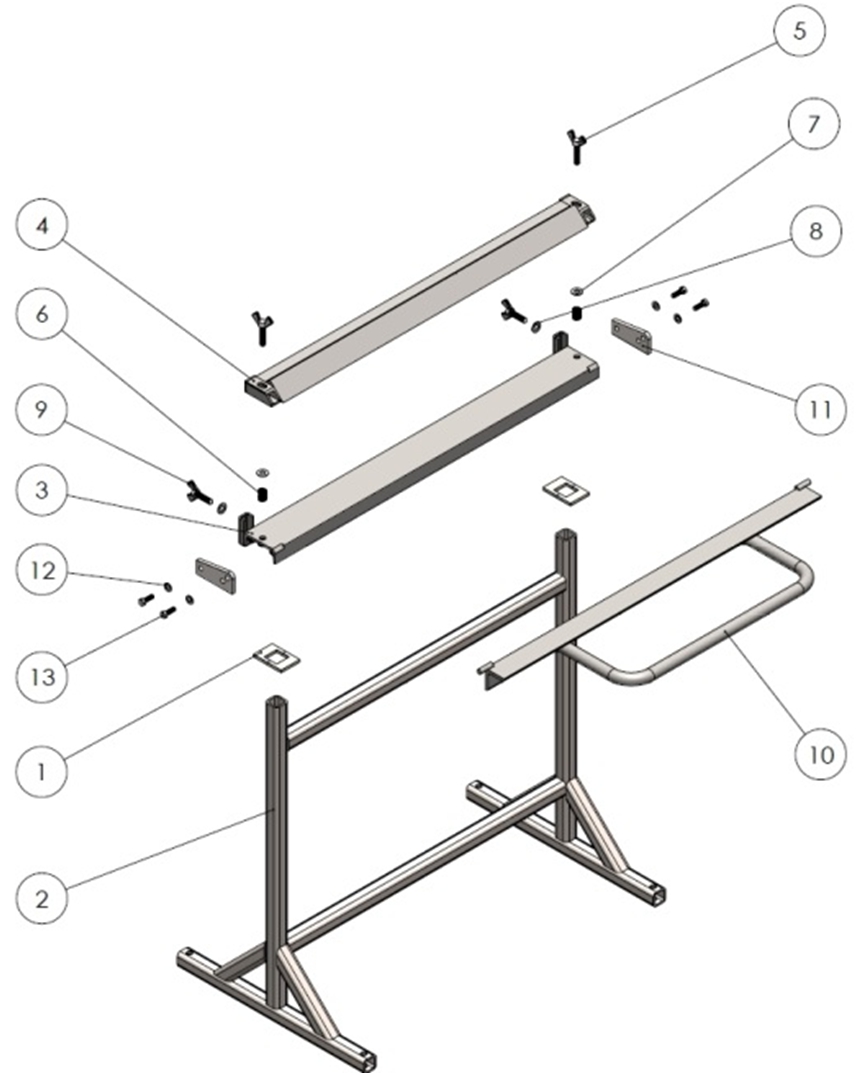 Fig. 5.1 Sheet metal brake montage plan.
Parts:
- Supports (SMB48 - 07.00.000).
- Stand (SMB48 - 01.00.000).
- Bending bed (SMB48 - 04.00.000).
- Die (SMB48 - 03.00.000).
- Wing screw Type A 0.625x3.
- Spring 0.97x1.75.
- Washer FW 0.625.
- Washer FW 0.625.
- Wing screw Type A 0.625x2.5.
- Bending arm (SMB48 - 02.00.000).
- Side plate (SMB48 - 06.00.000).
- Washer FW 0.5.
- HBOLT 0.5-13x1.5x1.25-S.
Step 1:
Before start assembling the Sheet Metal Brake prepare parts number 1 and 11.
Step 2:
Weld two support pairs (1) one against another and thread them through the square profiles of the stand (2). See montage plan Fig. 5.1.
Step 3:
Position Bending bed (3) over the stand. Ensure that the C-channel is exactly in the middle of the stand in both directions. Tack weld parts together and check alignment. Then pull up the supports and when they touch the C-channel tack weld in place. Check alignment again and then complete the welds.
Step 4:
Mount the Die (4) to Bending bed (3) using Wing screws (5). Also thread Spring (6) and Washer (7) before tightening the screws.
Step 5:
To complete mounting the Die screw Wing screws (9) with Washer (8) on the back of the Die.
Step 6:
Proceed to mounting the Bending arm (10). Thread Side plates (11) through round bars welded to Bending arm. Position the assembly on its place and screw with Bolts (13) and Washers (12). Reference to montage plan (Fig. 5.1) and main assembly drawing SMB48 - 00.00.000.
CONGRATULATIONS!
You finished assembling the Sheet Metal Brake!


Welding Plans:

New! Welding Table
New! Log Splitter
Top Projects:
