How To Use A Cutting Torch!

A cutting torch is found in all types of shops and on construction sites. There is always a need for cutting metal and a torch is very handy for many types of cutting jobs.
And the better you learn to handle the torch the more versatile it will be. This article covers the standard type of cutting torch which is an acetylene torch set up.
Pure oxygen is used for the cutting jet and it's mixed with either acetylene, propane, or commercial gas to provide the preheat flames.
An oxy acetylene mixture burns the hottest, somewhere around 5800 degrees, and that's what this article will be about: the acetylene cutting torch.
Propane is not as expensive as acetylene and so many people gravitate to this type of fuel. Oxypropane burns around 5300 degrees, which is plenty hot, but the rate of burn is smaller. So it takes just a little longer to preheat before a cut. Either oxyacetylene or oxypropane works well for torch cutting.
Oxidation and Cutting Metal:
A chemical reaction occurs when oxygen contacts metal. This chemical reaction is called oxidation and rust is the result of the process of oxidation.
As you heat metal to about 1800 degrees oxygen gets in contact with your metal and you then create combustion or rapid oxidation.
A cutting torch does the same kind of thing. It basically burns your metal and produces slag which results from iron oxide that is created as your torch burns the metal.
Why are you able to cut cleanly through carbon steel but not cleanly through aluminum, stainless steel, and cast iron?
Well, the oxides that are created as you heat and cut your metal melt at lower levels than the actual metal itself and since the cutting torch has such force it is actually is forcing the molten material (oxides) through before the metal actually melts.
Conversely it's more difficult to make a clean cut on aluminum, stainless steel, and cast iron because the oxides that you create as burn have a higher melting point than the actual metal you are cutting. In other words, the metal is being melted before the oxides can be forced through as you cut.

Cutting Torch Safety Tips:
Before we move on to more interesting stuff here are a few tips on acetylene cutting torch safety:
- You need to pay attention to what's going on around you, and try to anticipate what will happen as a result of what you do.
- Cutting torches are so hot that they can to burn almost anything so be careful where you are aiming it when it's lit.
- The slag alone can start a fire so keep your work area really clean.
- Keep anything flammable far away from your cutting area. This includes but is not limited to: solvents, paints, fuel, etc.
- If there are any rags, saw dust or paper in your work area be sure they are not smoldering because it's hard to notice it at first. So keep an eye out for things like this.
- Make sure you have a fire extinguisher that can handle any type of fire, and make sure you know how to work it.
- Do not wear clothing made of synthetic material, or frayed clothing. If synthetic clothing catches fire it will melt your skin.
- Wear a good set of boots, and safety glasses.
Cutting Torch Equipment Basics:
The bottles below can come in different sizes. Oxygen bottles are usually painted green, and acetylene bottles are commonly painted black but the one below is red.
By they way, acetylene is highly flammable but oxygen bottles are by far the most dangerous.

Many oxygen bottles are filled with over two thousand pounds per square inch which is a high-pressure bottle. If the valve is damaged or broken it will literally fly around your shop breaking everything in it's way.
You need to protect your valve. So whenever this bottle is not in use and the regulator's off or you intend to move the bottle, you need to use a protective valve cover even when the bottle's empty.
Acetylene gas is unstable at pressures over 15 pounds per square inch, so acetone is used inside the bottle as a stabilizer. As the acetylene is being filled, it's absorbed by the acetone. These bottles need to be straight up and down when in use.
Now whether these bottles are in a portable bottle cart or up against a wall, they need to be chained up securely. This is real important. You don't want to be able to pull them over with the hose or knock them over.
These bottles are regulated by the department of transportation. You need to secure them properly (chained), straight up and down when you transport them.

The above image is an oxy acetylene cutting
torch setup chart (except this image shows the setup with an oxy
acetylene welding torch).
Bottle Equipment Setup Tips and Guide:
- The oxygen regulator: and before you mount the regulators, stand behind the valve opening and crack the valve to blow out any dirt or moisture. The high-pressure gauge measures the pressure inside the bottle. The low-pressure gauge measures the working pressure coming out of the regulator.
- Regular adjustor: Screwed in or clockwise increases the pressure, and screwed out decreases the pressure. It also measures the pressure in side the bottle.
Acetylene is unstable at pressures over 15 pounds. The pressure adjustor is the same: screw in to increase the pressure, screwed out to decrease the pressure.
- The fittings on the fuel gauge regulator are notched to indicate left-handed thread. All the fittings on the fuel side of this equipment are notched with left-handed threads to avoid mixing the equipment and getting an oxy fuel gas mixture where you don't expect it.
- Red hose for acetylene and a green hose for oxygen (usually). Quarter inch is a stand hose size for normal cutting stations, and section of 3/16 hose is often added at the torch end.
- Flashback protectors. In case fire heads back down the torch these stop it before the fire heads down the hoses and regulators. You will buy these seperately:

Why Use Flashback Arrestors?
I learned about that when I had a flashback happen to me. I lit the cutting torch, adjusted the flame, and it shot back into the handle and reignited.
There was an explosion that severed the torch body from the hoses. The hoses were whipping around like an unmanned fire-hose with flames shooting out of them. I reached over and closed the valves on the bottles.
That's another thing, don't open the valves more than a full turn. You'll be glad you didn't crank them wide open when you have to shut them down quick! Hope this helps someone.
Here is a standard cutting torch with a welding tip attachment:
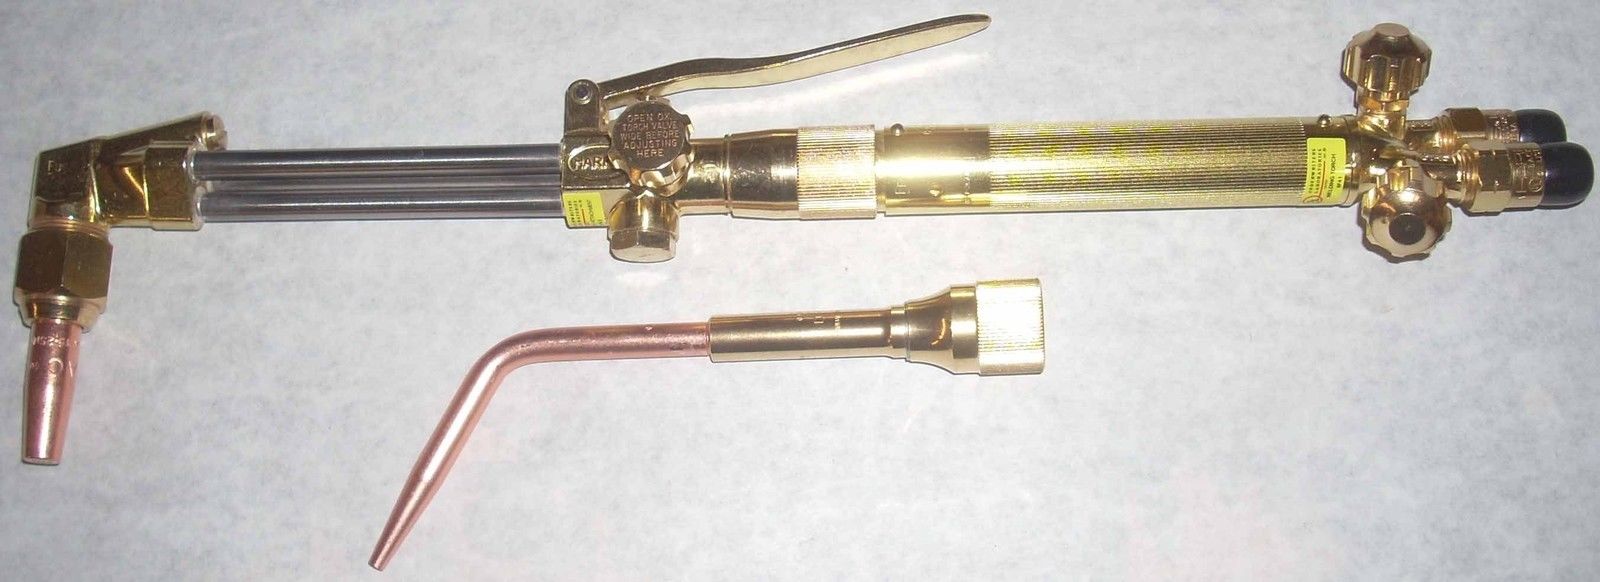
This is a breakdown of what a standard cutting torch looks inside and out:

Torch Body Breakdown:
Here are the main parts of a standard cutting torch explained:
Main oxygen and acetylene valves: These are stainless ball seed valves so when you close these. Don't tighten them too tight because you can damage them and then they will leak.

90-degree cutting head See Image Chart Above): You can also use a 75 and 45 degree cutting head which can be used for beveling
heavy steel. You can also get straight head for other but the 90-degree cutting head is the most common one.
Oxygen adjustment valve: These you will use to adjust the preheat flames...

Oxygen cutting jet
lever: The oxygen and acetylene are mixed in the head and not the torch
body.

All the cutting torch equipment we've looked at so far can either be used with acetylene or propane. We set up on an acetylene bottle, but the same fuel gas regulator can be used on a common propane tank.
- The only piece of
equipment is different depending on the fuel gas you use is the cutting tip. An
acetylene-cutting tip is a one-piece tip.
- A cutting tip used with propane is a 2-piece tip.
The rate of burn for propane is slower than acetylene so you will need more preheat flame.
Cutting tips come in different sizes so you'll need to look at a chart depending on what thickness metal you will be cutting.
The thicker the metal, the more pressure you need to get all the way through.
Torch Tip Diagram:

Acetylene Torch Tip Chart:

Cutting Torch Tip Chart Example: If I want to cut 3/4 inch metal look at the metal size chart and go down do 3/4. Then go across the column for the tip size to the acetylene pressure and oxygen pressure. In this case, to cut 3/4 inch metal I will need:
- Tip Size: 1.
- 3-5 Pounds of Acetylene.
- 30-35 Pounds of Oxygen.
To make good cuts you need to pay attention to the tip size and pressure settings.
If you don't have the exact size tip you can still cut the metal. You can probably get away with cutting different thickness meals with a small single tip.
But if you're going to cut a lot of metal that is one thickness or thicker metals then you will want to be sure you have the right size tip to get the job done well.
How To Light A Cutting Torch:
More Torch Equipment You'll Need:
- Cutting goggles: I like the type that fit's over safety glasses, a number 5 filtering lens, and I also like to use clear plastic lenses in front and in back to protect the filter lens.
- Striker.
- Tip cleaners.
- Chipping hammer.
- Good leather gloves. It gets hot!
- Wire brush: for cutting metal that's dirty, rusted, or painted.
Recommended:
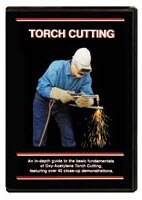
I highly recommend you get Steve Bleiles Torch Cutting DVD. It's loaded with exceptional tips and advice you never knew about when it comes to using this tool.
Steve's instructional DVD's are used in thousands of trade schools, colleges, and government institutions because they are simply the best and easy to understand.


Welding Plans:

New! Welding Table
New! Log Splitter
Top Projects:
