How To Build A Fire Pit!
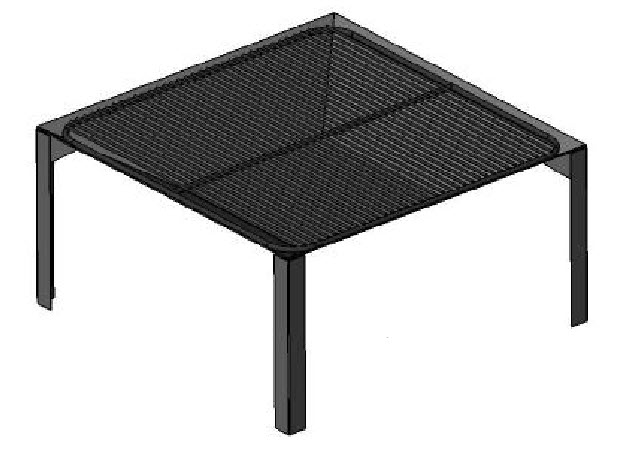
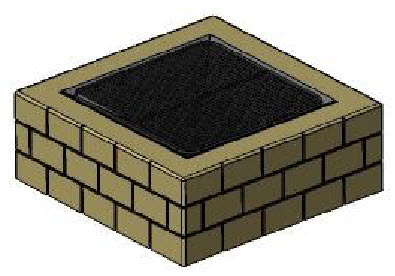
I am going to show you step by step how to build a nice outdoor fire pit that can be a stand alone metal one as seen below on the left, or you can make it really nice and surround it with bricks.
Notes: This fire pit is intended to be used with a brick or paver stone surround.
Stand Alone: |
Brick Surround:
 |
MATERIALS REQUIRED:
- 3 feet x 5.5 feet mild steel plate: 10 gauge .134.
- 4 inch X 12 inch mild steel sheet: 11 gauge or 1/8 inch.
- 4 angle section: 2 inch x 2 inch x 3/16 inch.
- 14 feet mild steel rod: .5 inch diameter.
- 105 feet mild steel rod: .25 inch diameter.
RECOMMENDED TOOLS:
- MIG, TIG, ARC, OR GAS Welder.
- Plasma cutter, or access to one.
- Rod bender or bending jig.
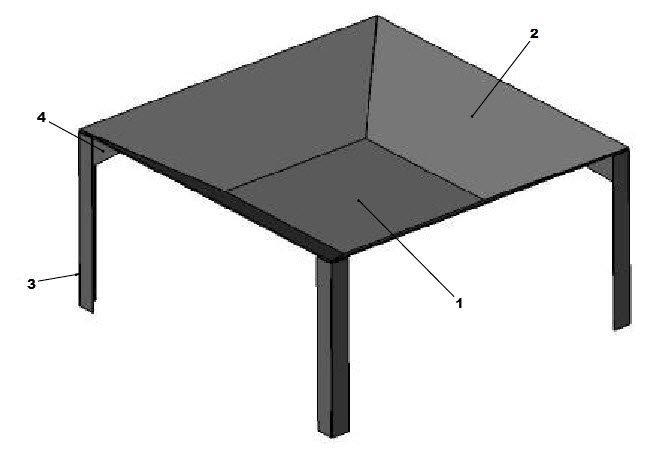
Basic Assembly Diagram:
Assembly List:

For a more detailed view of the assembly you can get the one page pdf version here. Or, for a 17 page document that provides every detail, measurement, and weldment you can get the full set of plans on this page.
Build This Fire Pit In 15 Easy Steps:
Step 1: Cut part numbers WP-910-2 and WP-910-3.
Step 2: Place WP-910-2 (bottom plate) on a flat work surface. Brace or prop one WP-910-3 (side plate) at the angle indicated on the drawing. Place the side plate bottom edge next to one of the edges of the bottom plate. The corners of each plate should be coincident to the other, they should match up. Tack weld in place. Check angle and alignment and complete the weld.
Step 3: Position anotherWP-910-3 side plate as in step 2. In addition, make sure the adjoining edges of the two side plates match up. Tack weld in place. Check alignment and complete the weld.
Step 4: Repeat step 2 and 3 for the remaining two side plates.
Step 5: Cut part number WP-910-4.
Step 6: Position the angle section legs as indicated on the drawing with the two edges of the angle section lined up with the two edges of the weldment at the corner. Tack weld in place. Make sure the leg is vertical and square in two directions. Complete the welds as indicated on the drawing.
Step 7: Repeat step 6 for the remaining three legs.
Grill Fabrication:
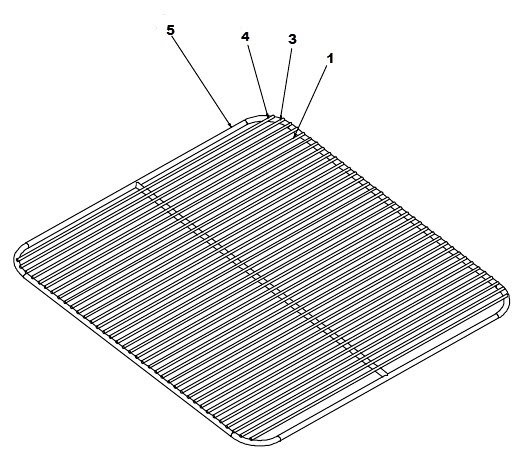
Grill Parts:

For a more detailed view of blue prints for the grill fabrication in pdf form go here.
Step 8: Cut part number WP-910-5.
Step 9: Position part number WP-910-5 (leg gusset) as shown on the drawing and tack weld in place. Check fit, alignment, and make sure the legs are square. Complete the welds. This completes the fire pit base.
Step 10: Cut part number WP-910-6.
Step 11: Using a rod bender, make the appropriate bends in the steel rod to make the grate
frame, as indicated on the drawing. Alternately, a bending jig can be
made using a wood block with the correct radius. Imagine a quarter of a
pie. Bend the rod around the radius of the block.
Step 12: Cut part number WP-910-7 and weld in place.
Step 13: Cut part number WP-910-8, WP-910-9, and WP-910-10.
Step 14: Weld these smaller steel rods in place as indicated on the drawing.
Note: only a small amount of weld is needed at the end of each rod and a spot in the middle of the frame where they contact WP-910-7.
Step 15: Finish the fire pit base with stove black or high temp paint.
If you completed the steps please send us your pictures and details! We will put them up on the site and share them. It will be a lot of fun.
Recommended Tutorial:
Copyright WcWelding.com All Rights Reserved.
Welding Plans:
New! Welding Table
New! Log Splitter
Top Projects:


