MIG Welding Tips and Tricks!
Lets go over some MIG welding tips that will help you get started welding and build your knowledge. I recommend you read my tips on the actual mig welder setup first but it's not a per-requisite.
How To Strike The Arc!
- To strike an arc you need to first clean the material which helps you get better contact with the metal. Impurities, if not cleaned, can interfere with your arc and contaminate your weld.
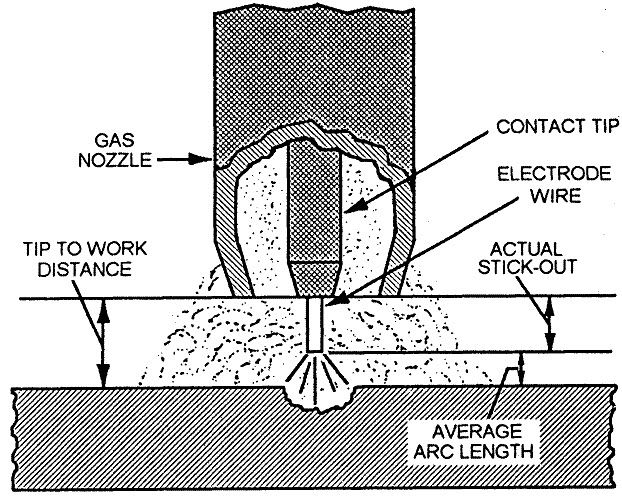
- Make sure your wire is not sticking out too much. If it is, it will more difficult to start your arc.
- Get your torch close to your base metal without touching it.
- You're wearing your helmet at this point, right? Lower it.
- Pull the welding torch trigger. This is when the shielding gas starts to flow.
- Use a brushing side-swipe motion and make contact with the base metal.
The wire does not feed until the welding torch electrode touches the base metal for welding.
The arc will strike once you touch your base metal. That is when the wire begins to feed, but only if you are pulling the trigger.
To avoid the possibility of your torch sticking to your base metal, pull the torch away the second you touch the base metal about one half of an inch.
Do You Hear A Sizzle or A Crackle?
In MIG welding, the sound is what you'll get familiar with. A good arc is when you hear a sizzle type of sound. Not too loud, not too quiet.
If you do not hear the right sound when you strike your arc then you need to adjust your settings on either the machine itself, the wire-feed settings, or both.
When your arc is too short the sizzling sound becomes louder and it becomes more like a crackle. In this situation a common remedy is to slow down the wire feed and what happens is the length of your arc will increase at the same time. Over a short period of time you'll get used to your machines settings and sound.
Push Versus Pull Mig Welding!
The argument over push versus the pull MIG welding technique is almost as old as the hills now. For every welder that says push is just as effective as pull, you'll find another welder with equal experience say there is not much of difference.
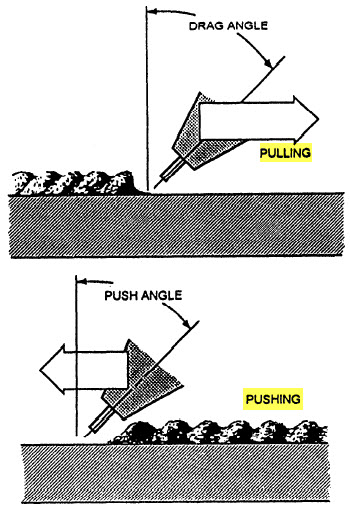
Anyway, when your are dragging your torch away from the weld it's called 'Pulling'. When your welding torch is behind the weld it's called 'Pushing'.
Let Me Settle The Push Versus Pull MIG Welding Argument Now And Forever!
Pulling your weld is best for heavy, thick metals. Pulling is also known as dragging. And the dragging MIG welding technique will give your more penetration than pushing your weld.
Pulling your weld is good because you can see the weld crater and when you can see your puddle you make better welds.
Conversely, if you are going to MIG weld thinner material you'll probably want to use the push welding technique. Why? Because it will not penetrate as deep as pulling, which is good on thin material because if you get to much penetration you'll burn through.
MIG Welding Position!
The welding position you are in can affect the weld. If you can get into a flat position when you weld that would be ideal because the molten metal flows better, you get a better weld bead, and the gas can shield your weld better as well.
The flat position is the best position to learn MIG welding. And once you get good at flat position welding you should be able to weld in the vertical, horizontal, and overhead positions fairly easily.
MIG Welding Heavier Metal!
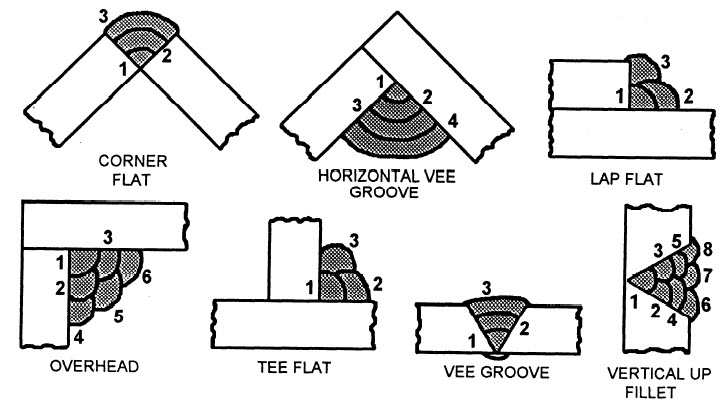
Simply put, use the multipass welding technique when welding thicker metal.
Multipass welding is when you use lay one string bead, and then overlay (overlap) the stringer bead with larger beads using a weaving motion.
Here are several ways to do MIG multipass welding. The numbers in each drawing shows you what sequence you would lay the bead down:
MIG Welding Position Tips!
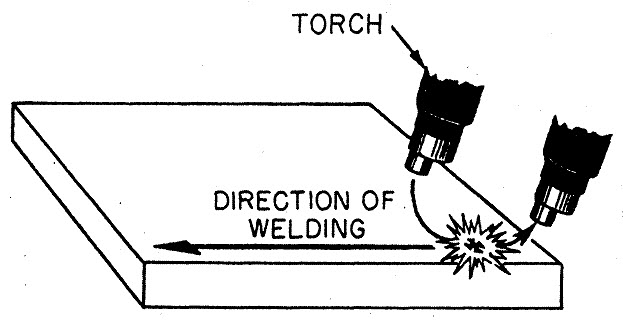
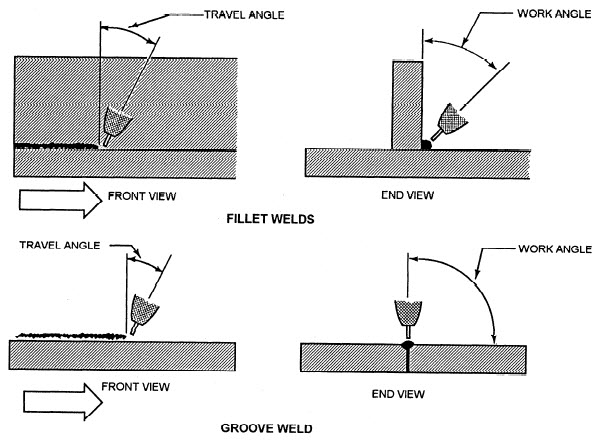
You need to have the right torch position to make a good weld. The terms used to describe this area of welding is the work and travel angle.
The work and travel angle is the angle you have the torch at in relation to the base metal (where you are going to weld). The word 'travel' describes the movement of your torch.
When you are welding a joint that has the same thickness then your work angle will take place in the center of the joint.
If you have metal pieces that are not the same thickness then simply angle your torch in the direction of the thicker metal.
The actual angle of your torch as you weld (the travel angle) should be anywhere from five to twenty five degrees.
MIG Welding Work and Travel Angles On Fillet and Groove Welds!
MIG Spatter and Your Nozzle!
In the MIG welder setup tutorial we went over many mig welding tips in reference to setting up the machine, feeding wire, and how to regular gas.
So once your machine is set up and you have the flow meter set, snip off the excess wire and you're ready to do some welding. However, I think it's a good idea to go over a few areas that you need to observe over time as you weld.
One of the main areas in MIG welding is making sure your machine is feeding the wire smoothly.
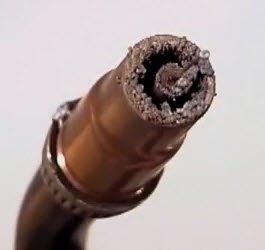
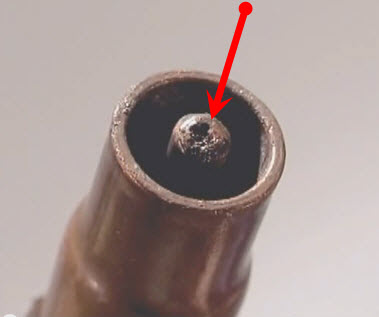
As you weld you'll see tiny pieces of spatter flying shooting out of your molten weld puddle. This spatter will get on your torch nozzle so you have to keep checking the nozzle tip to be sure it's clear of spatter as seen below.
There are many anti spatter dips and sprays which you can buy. And you should use them because they keep spatter from sticking to the nozzle.
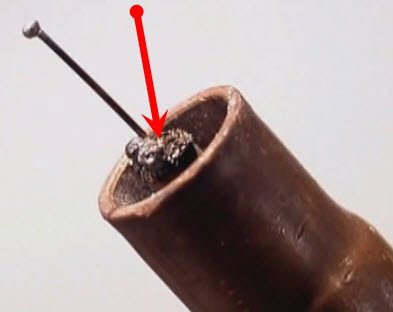
You can get weld spatter on the contact tip. The problem with that is if it gets hot it will expand and squeeze the wire and then the wire will not feed properly.
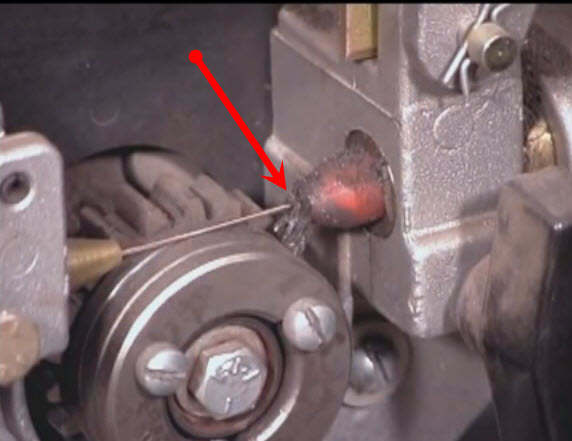
You can also get what is called 'burn back'. This is a problem that occurs when you're trying to start the arc if there is spatter on the contact tip. It can happen if you are in an awkward position or if the metal is not properly cleaned.
So keep a few extra contact tips at the ready in case you need to replace them, which will happen more often than you realize. There's nothing worse than having to replace the tip and then not having any on hand.
Although your wire spool has shiny, clean looking wire, it will still cause dust from the shop to gum up the liner right where the wire goes in.
If not cleaned it can build up so much that the wire can stop feeding smoothly.
You should install a wiper on the wire to help keep the wire clean and keep the wire feeding well. You can't make good welds if the wire is is not coming out consistently and smoothly!
You will have problems with your welder over time, however most of the problems occur as a result of direct and spatter build up so keep your machine and your torch clean. You'll save yourself a lot of trouble.
Mig Welding Wire Tips!
MIG welding was originally created for industrial welding because it was fast. So you'll discover that most of the gas and wire for MIG are used for high speed production.
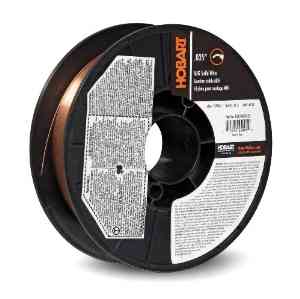
Here Are The Most Common MIG Wire Types For Welding Carbon Steel:
- ER70S-7
- ER70S-6
- ER70S-5
- ER70S-4
- ER70S-3
- ER70S-2
Of these six wire types for welding on carbon steel, the most commonly used is ER70S-6.
All of the wires have a tensile strength of seventy thousand pounds per square inch. That is what the 70 is in the wire numbers above.
What is tensile strength? It's the amount of force required to pull it apart.
MIG Wire Differences!
The difference between the filler wires is the type and amount of chemicals that are added to the metal, these are called oxidizers and help clean the surface of oxides and gases from the molten weld, many small slag deposits on the finished weld bead.
ER70S-6 has higher amounts of silicon and manganese. This wire is more expensive, but it produces good welds in different welding situations.
The diameter of the filler wire selected for the amount of the finished weld required and the deposit rate.
Filler Wire Diameter:
- .023 is for small machines.
- .030 is for gauge metals.
- .035 is for metal that is up to 3/16".
- .045 is for metal that is 1/4" and over.
On heavier metal, .O45 will provide high filler metal deposit rates.
Most of us will be doing a lot of general purpose type welding. You know, fixing things around the house, shop, or farm. Or building projects like grills, frames, tables, garden art, and other handy things that have similar types of metal thicknesses.
In other words, we will rarely if ever do any structural welding like for bridges and things.
So we should be willing to make a compromise where wire is concerned.
For example, if we are welding thicker material it's probably a better idea to use smaller wire like, .O35, and then turn up the machine. This will give you better welding results than putting in .045 wire and then turning the machine down, and running it cold for the thinner material.
Angle and Distance Of Your Torch!
The distance that the wire feed gun is held from the metal does give the welder a little more control of the heat.
For good hot starts hold the gun close to increased the amperage and heat. For thinner gauge metals or for filling gaps, the gun can be pulled away which will reduce the heat and limit penetration.
You have to be careful not to pull the gun too far away or the weld would get too cold and may not fuse. You may even use shield gas coverage causing porosity in the weld bead.
For most welding situations, hold the gun close to start the weld then try to maintain a consistent ¼ to 3/8 of an inch wire stick out.
Where The Wire Is In The Puddle Is Important!
With the arc on arc off characteristics and short-circuit transfer there's not a lot of arc force to help the filler metal into the weld.
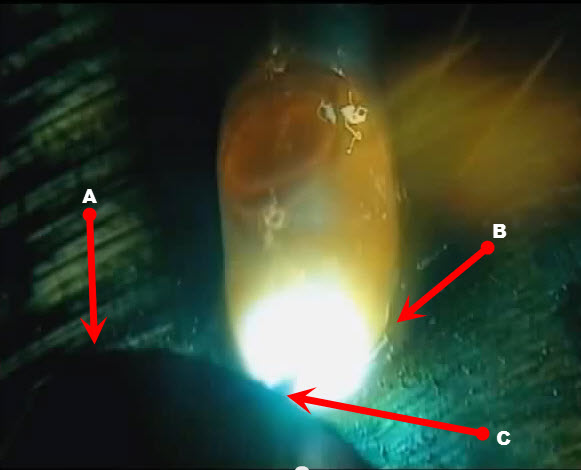
For penetration and weld fusion you want to keep the wire and the arc directed at the leading edge of the molten puddle. See image below:
- A = Nozzle.
- B = Lead Edge Of Weld Puddle.
- C = Wire.
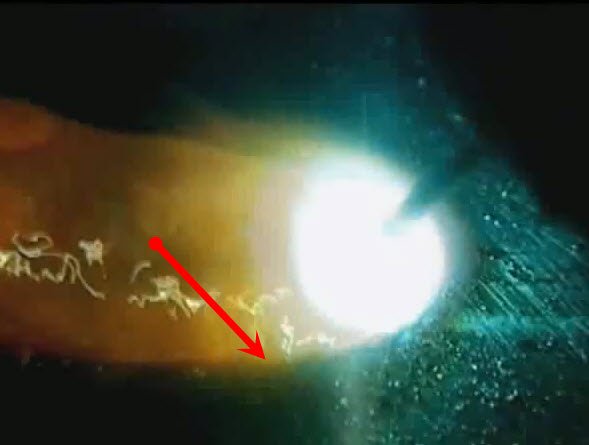
If the wire is directed at the back of the puddle with
molten metal floating in front of the arc, the weld build-up absorbs most of the heat and therefore the base metal does not get hot enough to melt.
The weld can actually float right on top without penetrating or fuse into the base. What happens is you get what looks like a really good weld, but then it actually doesn't have good fusion.
MIG Welding Knowledge Reminder: To get good fusion you need both the filler metal and the base metal to melt and fuse together to make a good weld.
So what you want to do is maintain a short wire stick-out and stay ahead of the weld, and keep the mig welding wire on the leading edge of the puddle.
For most welds, you can just move the gun in a straight line a consistent wire stick out and travel speed will produce a nice looking weld with uniform penetration and weld fusion.
You can also use a slight side to side motion as you watch the outside edges of the puddle to make sure the weld is straight.
For situations where a little more torch movement is required, a U or an upside down U will keep the arc at the front on the puddle.
There are exceptions but in wire feed you want to avoid big wide gun moment. It makes the puddle too difficult to control.
If you need more weld build up you can increase the wire speed and voltage the square more weld or switch to a bigger wire size.
Making Wider Welds!
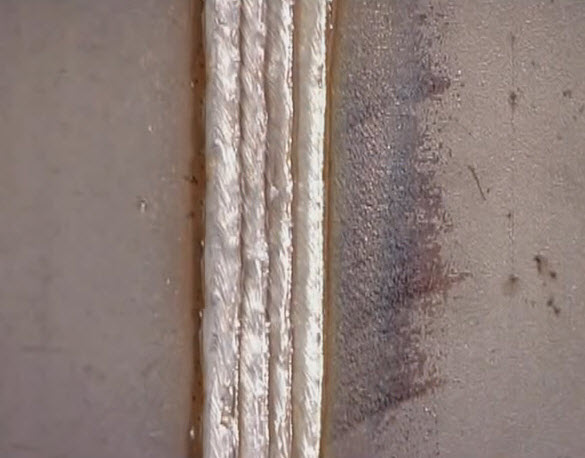
A mig welding tip for making wider welds is where you stack overlapping weld beads side by side.
The speed of travel, or how fast you move the gun, depends on how much heat is at the weld.
You do need to move right along without hesitation to avoid excessive weld build up.
But you also have to give the arc enough time to melt the base metal allowing the filler metal to flow out and tie in on the sides.
To some extent you can see how the molten filler metal fusing with the melted base base metal by watching the edge in the molten puddle..
Keep in mind that if your travel speed is too fast the metal doesn't have time to heat up. And what will happen is the weld bead will stack up on top and may not fuse to the base metal.
Traveling too slow will generally put the wire and the arc on the weld build up. And if the wire and the arc are on the weld build up it will cause excessive filler metal to be deposited, which reduces the amount of heat to the base metal.
Controlling travel speed is the main option use during the weld to control the size of the weld ensure good weld fusion.
- Make sure the puddle flows out and ties in on the sides.
- Watch the top of the puddle to avoid excessive weld build up.
Recommended Guide:
GMAW (MIG) Welding by Steve Bliele.
GMAW (MIG) Welding Problems and Solutions.
Welding Plans:
New! Welding Table
New! Log Splitter
Top Projects:
